


Build your own headboard and transform your bedroom into a stylish and personalized retreat without breaking the bank. Whether you’re aiming for a cozy upholstered look or a rustic wooden design, creating a custom headboard is a fun and rewarding weekend project. In this guide, we’ll walk you through easy-to-follow steps, essential tools, and creative ideas to help you craft a beautiful DIY headboard that perfectly fits your space and style. No advanced skills required—just a bit of time, some materials, and a touch of creativity!
Why Build Your Own Headboard?
Building your own headboard is a fantastic way to add a unique, personal touch to your bedroom while saving money. Unlike purchasing a pre-made headboard, a DIY headboard allows you to control every detail—from materials to style and finish—ensuring the final piece perfectly matches your taste and space. Whether you want something modern, rustic, or cozy, creating your own headboard opens up endless design possibilities tailored specifically for you.
Save Money, Add Personality
One of the key benefits of choosing to build your own headboard is the potential for significant cost savings. Off-the-shelf headboards, especially custom or designer styles, can be costly. By crafting your own, you avoid those markups and pick affordable materials that suit your budget. Beyond financial savings, this project lets you infuse your personality into your bedroom decor. Choosing fabrics, wood types, and finishes allows you to create a truly unique statement piece.
Weekend Satisfaction: Start and Finish in Two Days
A DIY headboard project is perfectly suited for a weekend, making it accessible even for beginners. Weekend projects strike a great balance—they’re substantial enough to make a noticeable difference but manageable within a short timeframe. Starting on Saturday morning and wrapping up by Sunday evening means you get the instant gratification of transforming your bedroom quickly, without a drawn-out process or costly delays.
Fit Your Space, Fit Your Style
Building your own headboard also gives you full control over size and design, so you can adapt it to fit your room’s unique dimensions and style. Many bedrooms have spaces or layouts that standard headboards don’t accommodate well. When you build your own headboard, you can customize the height, width, and shape for a perfect fit. Plus, you can coordinate your design with existing decor elements—like wall colors and furniture styles—to create a cohesive and inviting bedroom atmosphere.
Tools & Materials You’ll Need
Before starting your build your own headboard project, it’s important to gather the right tools and materials. Having everything on hand will make the process smoother and more enjoyable, especially if you plan to complete it over a weekend.
Essential Tools
To create a sturdy and well-finished headboard, some basic tools are essential. You will typically need a power drill for assembling pieces, screws for fastening, a measuring tape to ensure accuracy, and a level to keep everything straight and balanced. If you don’t have access to power tools, there are alternatives like hand drills or screwdrivers that can work for smaller projects, though they may require more time and effort.
Materials by Type of Headboard
The materials you choose will depend on the style and comfort level you want for your DIY headboard. Common options include wood planks or plywood for solid bases, foam and fabric for upholstered designs, and batting to add softness. Each material offers a different look and feel, so picking the right combination is key to achieving your desired aesthetic.
Common Materials vs. Their Use & Look
| Material | Purpose | Aesthetic Style |
|---|---|---|
| Plywood | Base frame | Clean, minimal |
| Foam + Fabric | Comfort, style | Upholstered, cozy look |
| Reclaimed Wood | Rustic look | Farmhouse, vintage |
Choosing the Right Headboard Style
Selecting the perfect style for your build your own headboard project is a crucial step that affects both the look and function of your bedroom. Different styles come with their own benefits and challenges, so understanding these can help you make a confident choice.
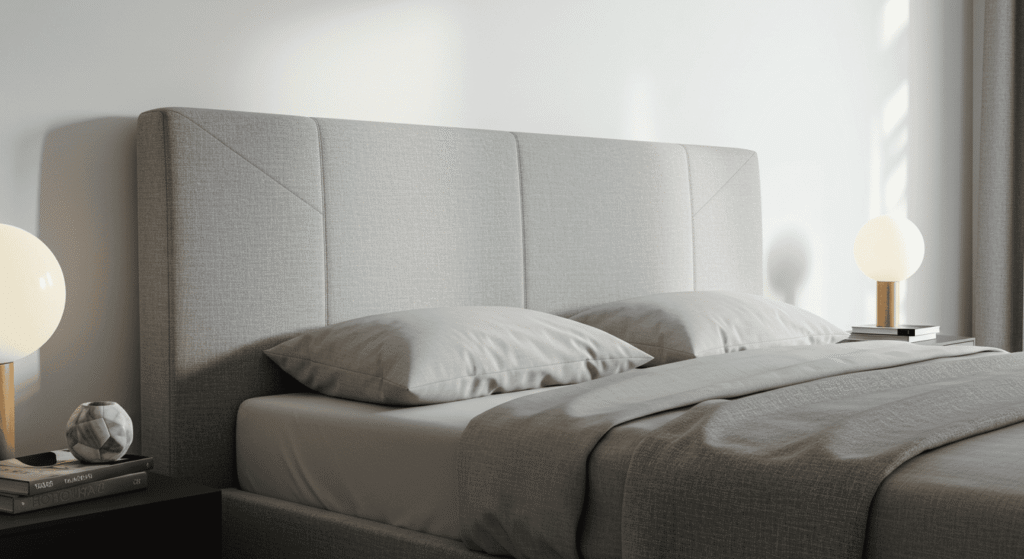
Upholstered, Wood, or Wall-Mounted?
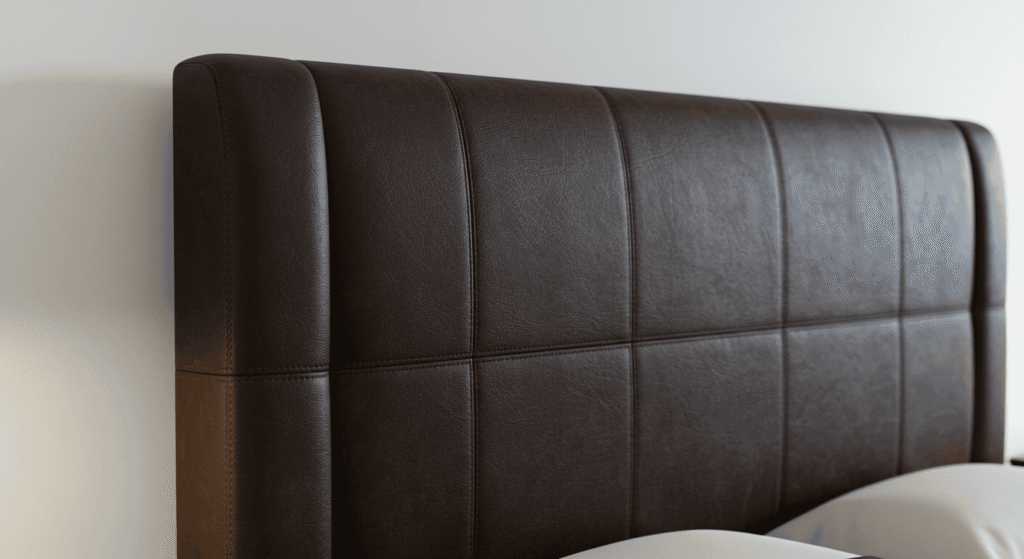
Each headboard style offers unique advantages. Upholstered headboards provide softness and comfort, making them great for leaning against while reading or watching TV. Wood headboards are sturdy, durable, and can fit a variety of decor styles from rustic to modern. Wall-mounted headboards save floor space and create a sleek, minimalist look. However, consider factors like installation complexity and maintenance when choosing the best style for your room.
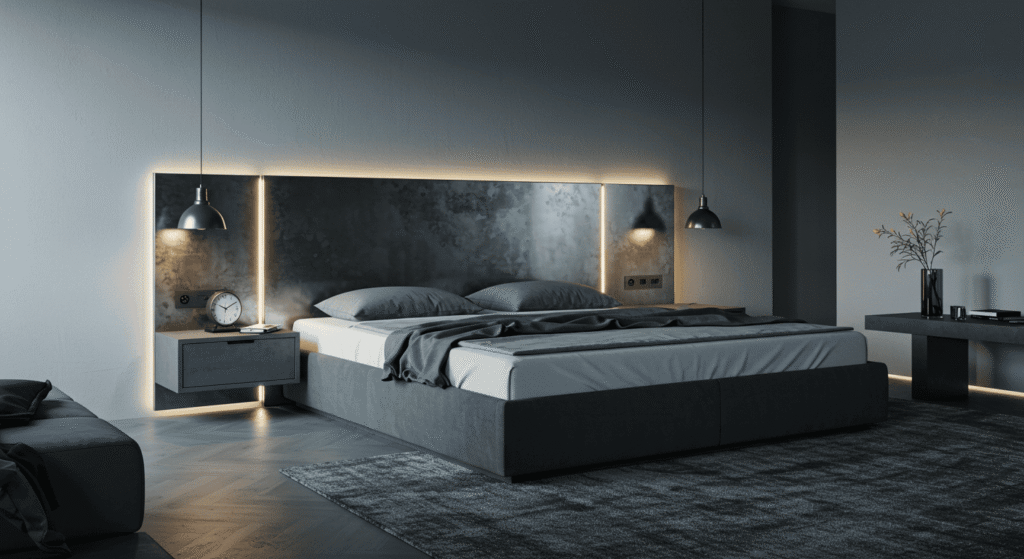
Minimalist vs. Statement Designs
Deciding between a minimalist or a bold statement headboard depends on your overall bedroom style and personal preference. Minimalist headboards work well in smaller spaces or if you want a calming, understated vibe. Statement headboards, on the other hand, can become the focal point of the room with dramatic shapes, colors, or textures. Knowing when to keep it subtle or go bold will help balance the space beautifully.
Matching Bed Size with Headboard Dimensions
Properly sizing your headboard ensures a harmonious look and functional fit. A headboard that is too narrow or too tall can throw off the balance of your bed and room. Use the following table as a guideline to choose the ideal width and height for common bed sizes:
| Bed Size | Headboard Width | Headboard Height |
|---|---|---|
| Twin | 41–44 inches | 36–48 inches |
| Queen | 62–65 inches | 48–60 inches |
| King | 78–82 inches | 60–70 inches |
DIY Headboard Projects for Every Skill Level
No matter your experience level, there’s a build your own headboard project that fits your skills and time. From simple designs to more complex creations, these projects will help you personalize your bedroom and enjoy the satisfaction of making something yourself.
Beginner: Fabric-Wrapped Headboard
Perfect for those new to DIY, the fabric-wrapped headboard requires minimal tools and no sewing skills. The process involves stretching fabric over a pre-cut board and securing it with a staple gun. This project is quick, affordable, and offers endless options for colors and patterns, making it an easy way to add softness and style to your bedroom.
Intermediate: Wooden Slat Design
If you’re comfortable with basic tools like saws and drills, the wooden slat headboard is an excellent next step. This design involves cutting wood slats to size and arranging them in a modern, clean pattern. It’s both stylish and budget-friendly, allowing you to customize the finish and layout to suit your space.
Advanced: Built-in Shelving Headboard
For experienced DIYers looking for both style and functionality, a built-in shelving headboard is a fantastic choice. This project combines woodworking and design to create a headboard with integrated shelves for books, décor, or bedside essentials. It’s especially useful in bedrooms with limited storage space, offering a smart solution without sacrificing aesthetics.
Step-by-Step Guide: Build a Simple Upholstered Headboard
Creating a simple upholstered headboard is a rewarding project that combines comfort and style. This guide breaks down the process into clear, manageable steps to help you achieve a polished, professional look—even if it’s your first time.
Step 1: Measure, Cut, and Prepare Your Base
Start by measuring your bed to determine the appropriate size for your headboard. Use plywood or a sturdy base material cut to these dimensions. Make sure the edges are smooth and any rough spots are sanded down to prepare for the next steps.
Step 2: Add Foam and Batting
Next, attach a layer of foam to the base to add cushioning. Cover the foam with batting for extra softness and to smooth out any sharp edges. Use spray adhesive or another secure method to keep the foam and batting in place.
Step 3: Stretch Fabric and Staple Neatly
Finally, select a fabric that complements your room and stretch it tightly over the batting and base. Use a staple gun to secure the fabric on the back of the headboard, making sure to pull it taut for a smooth, wrinkle-free finish.
Time & Tools Required for Each Step
| Step | Tools Needed | Estimated Time |
|---|---|---|
| Measure & Cut Base | Saw, Tape Measure | 30 mins |
| Add Foam & Batting | Scissors, Spray Adhesive | 45 mins |
| Staple Fabric | Staple Gun | 45 mins |
Maintenance & Cleaning Tips
Taking care of your headboard ensures it stays looking fresh and beautiful for years to come. Different materials require specific care, so here’s how to maintain both upholstered and wooden headboards, as well as the surrounding wall area.
For Upholstered Headboards
Regular dusting helps prevent dirt buildup on fabric surfaces. For spot cleaning, use a mild detergent mixed with water and gently blot stains with a clean cloth—avoid rubbing to prevent damage. On the other hand, for tougher stains, consider upholstery cleaners designed for delicate fabrics, always testing in an inconspicuous area first.
For Wooden Headboards
Wooden headboards benefit from routine polishing to maintain their shine and protect the surface. Light sanding can smooth out minor scratches or imperfections before applying a wood-friendly polish or wax. To protect the wood, avoid placing the headboard in direct sunlight or areas with high humidity.
Keeping Your Headboard Wall Clean
Walls behind headboards can develop scuff marks or dust buildup over time. Regularly wipe down the wall with a soft cloth or mild cleaner to prevent stains. Consider using a washable wall paint or a protective panel behind the headboard to minimize marks and keep your bedroom looking tidy.
Creative Customization Ideas
Personalizing your headboard can turn a simple piece into a stunning centerpiece that reflects your style and creativity. Here are some inventive ideas to customize your DIY headboard and make it truly unique.
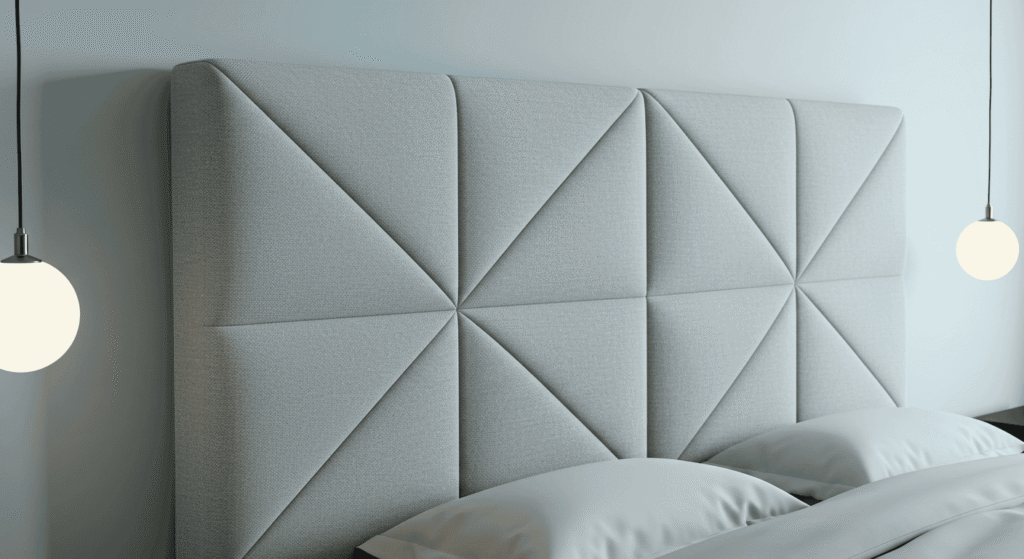
Add Texture with Panels or Trim
Enhance the visual appeal by framing your headboard with decorative molding or trim. This adds dimension and a polished finish. Alternatively, use padded tiles or decorative panels to introduce texture and create an eye-catching focal point that complements your bedroom’s design.
Use Paint or Fabric to Match the Vibe
Experiment with paint techniques like ombre effects, color-blocking, or textured paint finishes to give your headboard a custom look. If fabric is your choice, selecting patterns or colors that harmonize with your room’s palette will tie the whole space together beautifully.
Add Hidden Features
Small Shelves or Slots
Incorporate small shelves or slots within your headboard design to hold bedtime essentials like books, glasses, or a nighttime drink. This functional addition maximizes space without sacrificing style.
Hooks for Charging Cables or Accessories
Add discreet hooks to keep charging cables, headphones, or other accessories organized and within easy reach. These hidden features improve convenience while maintaining a clean, clutter-free look.
Final Checklist & Weekend Planning Tips
Planning ahead can make your build your own headboard weekend project efficient and enjoyable. Use this final checklist to stay organized and avoid common pitfalls, ensuring a smooth and satisfying DIY experience.
Your Weekend DIY Timeline
Breaking down the project into manageable time blocks helps you stay on track and complete your headboard within two days. Here’s a suggested schedule to maximize productivity without feeling rushed:
| Day | Task | Time Estimate |
|---|---|---|
| Saturday AM | Gather tools & materials, cut base | 2 hours |
| Saturday PM | Build frame & prep for finish | 3 hours |
| Sunday AM | Assemble, upholster, decorate | 3 hours |
| Sunday PM | Mount & final touches | 2 hours |
What to Double-Check Before Starting
Taking a few extra minutes to double-check your measurements can save hours of frustration. Always “measure twice, cut once” to avoid costly mistakes. Dry-fit components before final attachment to ensure everything aligns perfectly.
Common Mistakes to Avoid
Avoid uneven edges by sanding carefully and keeping cuts straight. Ensure mounts are level and secure to prevent a crooked headboard. Don’t rush the stapling process—loose staples can cause fabric to sag or shift over time. Being mindful of these details leads to a polished and durable finished piece.
Why Building Your Own Headboard Is Worth It
Building your own headboard is more than just a weekend project—it’s a chance to add personal style, save money, and create a functional piece perfectly tailored to your space. Whether you choose a simple upholstered design or a more advanced custom build, the satisfaction of transforming your bedroom with a DIY headboard is unmatched. With the right tools, materials, and a bit of creativity, anyone can achieve a beautiful and unique result that elevates their home. So, roll up your sleeves and start your headboard project—your bedroom makeover awaits!