


How do I fix a leaky roof? If you’ve found yourself asking this question, you’re not alone. A leaky roof can quickly turn from a minor drip into a costly headache if left untreated. Whether caused by worn-out shingles, damaged flashing, or storm damage, knowing the right steps to repair the leak can save you time, money, and stress. In this guide, we’ll walk you through practical and effective ways to fix a leaky roof, share quick emergency tips, and help you understand how to prevent future leaks. Let’s stop that leak the right way — before it causes any more damage!
Understanding Roof Leaks: Why They Happen and How to Spot Them
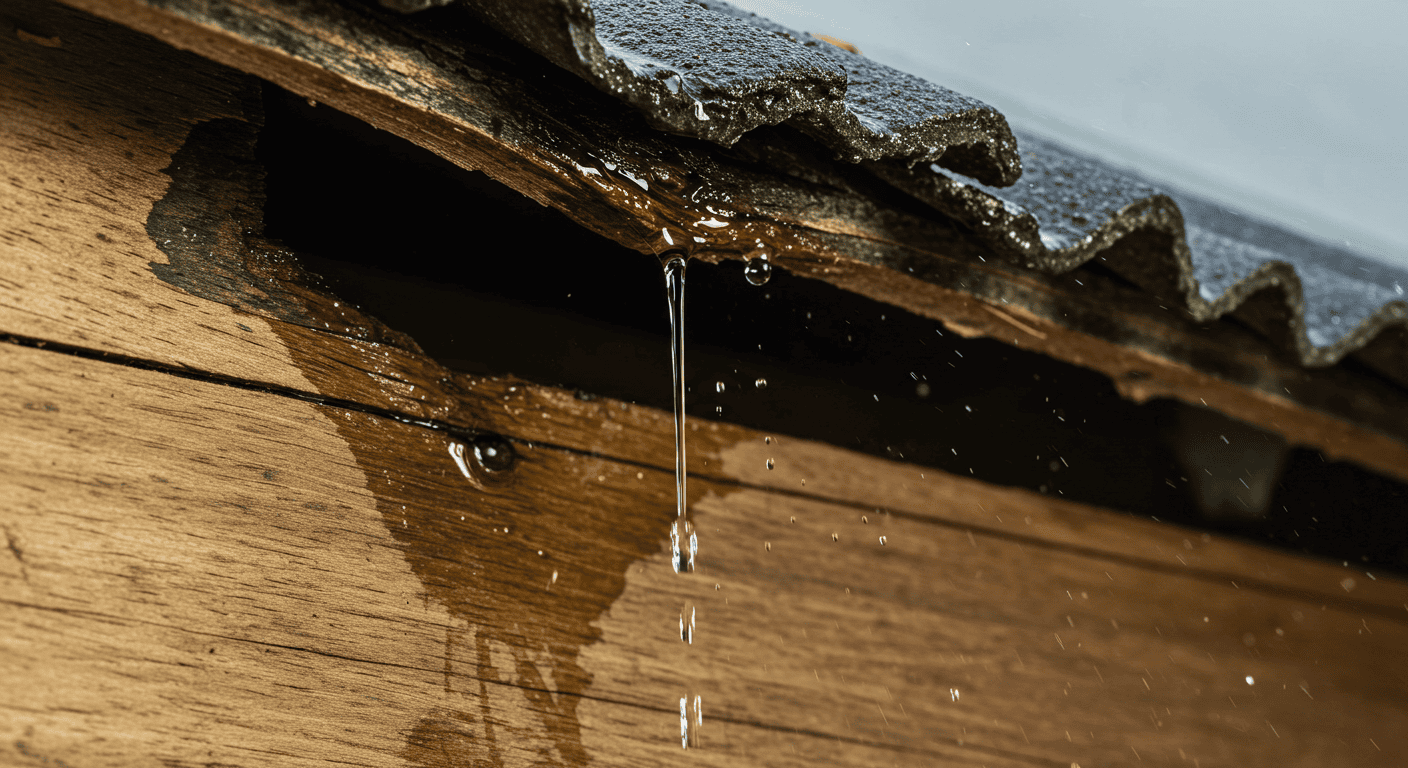
Roof leaks can be a homeowner’s nightmare, but understanding why they happen and how to recognize them early is key to preventing costly damage. Leaks often develop slowly, and spotting the warning signs before water causes significant harm can save you both time and money. This section explores the most common causes of roof leaks and teaches you how to detect them before they escalate.
Common Causes of Roof Leaks
Roof leaks usually have identifiable causes. By knowing these, you can better diagnose the problem and apply the right fix.
Wear and Tear: Aging Shingles and Flashing
As roofs age, materials naturally deteriorate. Shingles can become brittle, crack, or lose their protective granules, reducing their ability to shed water effectively. Flashing—the metal strips installed around roof joints and chimneys—may corrode, loosen, or develop gaps over time. This wear and tear create vulnerable spots where water can easily penetrate.
Storm Damage and Debris Impact
Harsh weather conditions like heavy rain, hail, strong winds, or snow can damage roofing materials quickly. Hailstones can crack or chip shingles, while high winds can lift or remove them entirely. Additionally, falling branches and accumulated debris can puncture or strain the roof’s surface, creating entry points for water.
Poor Installation or Maintenance
Sometimes leaks are the result of faulty installation, where shingles, flashing, or underlayment were not properly secured or sealed. Neglecting regular roof maintenance—such as clearing gutters, inspecting the roof after storms, or addressing minor damage—allows small problems to worsen into leaks.
How to Detect a Roof Leak Before It’s Too Late
Catching a roof leak early can prevent serious damage. Learning to recognize both interior and exterior signs will help you act quickly.
Signs Inside Your Home: Ceiling Stains & Mold
One of the earliest clues of a leak is discoloration on ceilings or walls. Water stains often appear as yellow or brown patches, sometimes accompanied by peeling paint or bubbling wallpaper. Persistent moisture encourages mold and mildew growth, which can affect your home’s air quality and structural integrity.
Outdoor Clues: Damaged Shingles & Flashing
Regularly inspect your roof for missing, cracked, or curling shingles. Also, examine flashing around chimneys, vents, and valleys for rust, cracks, or separation from the roof surface. These are frequent points where leaks originate.
| Symptom | Possible Cause |
|---|---|
| Brown ceiling spot | Damaged flashing or shingles |
| Curling or missing shingles | Weather damage or aging |
| Mold growth in attic | Prolonged moisture from leak |
Safety First: What You Need to Know Before Climbing Up
Before attempting to fix a leaky roof, safety should always be your top priority. Roof work involves risks such as falls, unstable surfaces, and unexpected weather changes. Understanding the necessary safety gear and precautions can help protect you from injury. Additionally, knowing when a repair is too complex or dangerous for a DIY approach will ensure you make the safest and smartest decision for your home.
Roof Safety Essentials: Gear and Precautions
Proper safety equipment is crucial when working on a roof. At minimum, you should use non-slip shoes designed for roofing, a sturdy ladder with a secure footing, and a safety harness if possible. Always check the weather forecast and avoid working in wet or windy conditions, as slippery surfaces increase the risk of accidents. Never rush your work—take your time to move carefully and stay aware of your surroundings.
When to Call a Professional Instead of DIY
While many roof leaks can be repaired by homeowners, some situations call for expert help. If your roof is steep, has multiple layers of old shingles, or if the leak source is difficult to locate, it’s safer to hire a professional. Extensive water damage or structural issues also require specialized equipment and skills. Recognizing these red flags early will save you from costly mistakes or injury.
Interactive idea:
Include a Quick Safety Quiz to help readers decide whether they should attempt the repair themselves or call a pro. For example:
- Is your roof steep or difficult to access? (Yes/No)
- Do you have proper safety gear? (Yes/No)
- Is the leak causing significant water damage inside your home? (Yes/No)
Based on answers, guide readers to the safest choice. This interactive element makes safety a practical and memorable part of your post.
Quick Temporary Fixes: Stop That Leak Now!
When faced with a sudden roof leak, acting fast can prevent further damage to your home. While these quick fixes aren’t permanent solutions, they buy you valuable time to plan proper repairs. Knowing how to safely apply emergency measures will help you control the leak and protect your interior from water damage until a full repair is possible.
Emergency Tarping and Sealing Techniques
One of the most effective temporary fixes is covering the damaged area with a waterproof tarp. Secure the tarp firmly using nails or heavy-duty staples, making sure it extends beyond the leak zone to divert water away from your roof. In addition, applying temporary sealants around visible cracks or holes can help slow water entry during heavy rain.
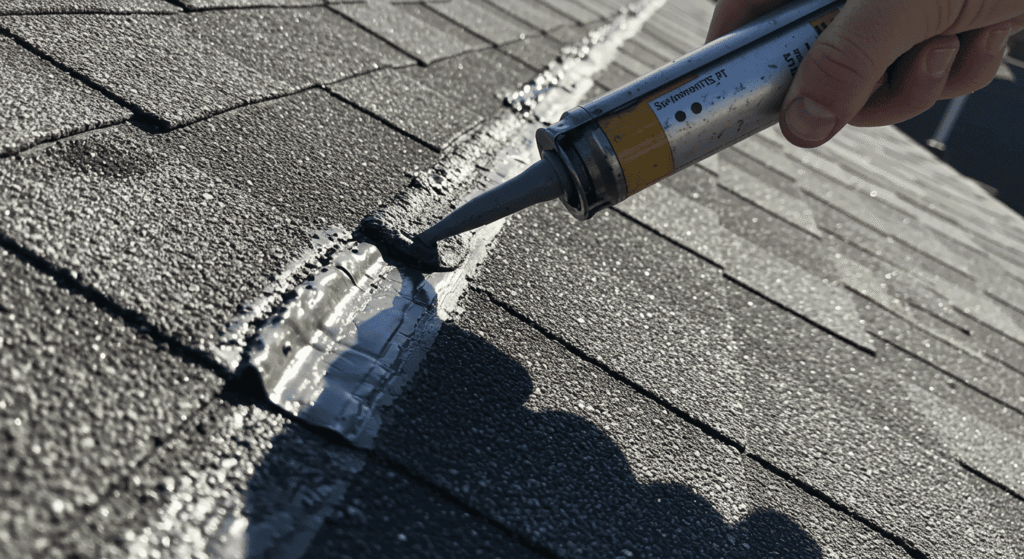
Using Roofing Cement and Sealants for Instant Repairs
Roofing cement is a handy material to seal small cracks, gaps around flashing, or punctures in shingles. Simply clean the damaged area, apply a generous layer of roofing cement, and press a patch of roofing fabric or a shingle piece over it for reinforcement. This quick fix can hold until you schedule a professional repair.
How to Patch Roof Leaks from Inside the Attic
If climbing onto the roof isn’t safe, you can tackle minor leaks from the attic side. Locate the wet or stained spots on the underside of the roof deck, then apply roofing cement or waterproof tape to seal gaps. While this doesn’t address the root cause, it can reduce water intrusion temporarily and protect your home’s interior.
Step-by-Step Guide: How to Fix a Leaky Roof Properly
Fixing a leaky roof the right way requires careful preparation and attention to detail. This step-by-step guide will walk you through the essential stages of repair—from gathering the right tools to replacing damaged materials—so you can confidently restore your roof’s integrity and keep your home dry.
Tools and Materials You’ll Need (Without Brand Names)
Before starting, make sure you have the right tools and materials on hand. Common essentials include a sturdy ladder, roofing nails, a hammer or nail gun, roofing cement, roofing sealant, a utility knife, a pry bar for removing shingles, roofing fabric patches, and safety gear like gloves and non-slip shoes. Having everything ready will make the process smoother and safer.
Removing Damaged Shingles and Cleaning the Area
Start by carefully lifting the damaged shingles using a pry bar or flat tool, removing any nails or debris. Clear away dirt, old roofing cement, and loose granules from the exposed area. This clean surface ensures proper adhesion when you apply new materials, preventing future leaks.
Applying Roofing Cement and Sealant the Right Way
Apply a generous layer of roofing cement over the exposed roof deck, spreading it evenly with a putty knife or trowel. If using roofing fabric patches, press them firmly into the cement while it’s still wet, then cover with an additional layer to seal edges. For smaller cracks or nail holes, roofing sealant can be applied directly to seal out moisture.
Replacing Flashing and Underlayment (Basics)
If flashing or underlayment is damaged, remove the old pieces carefully and replace them with new materials. Proper installation is crucial—ensure flashing overlaps are sealed tightly with roofing cement and nails are securely fastened without causing new gaps. The underlayment beneath shingles should be intact to provide an additional waterproof barrier.
| Tool | Purpose | Tip |
|---|---|---|
| Pry Bar | Remove damaged shingles | Use gently to avoid damaging roof |
| Roofing Cement | Seal and patch leaks | Apply thick layers for durability |
| Utility Knife | Cut shingles and patches | Keep blade sharp for clean cuts |
Understanding Roof Flashing and Its Role in Leaks
When fixing a leaky roof, understanding the role of roof flashing is essential. Flashing acts as a critical barrier that directs water away from vulnerable joints and roof penetrations. If flashing fails or is improperly installed, it often becomes the main source of leaks. This section breaks down what flashing is, how to inspect it, and the best methods to repair and maintain it for long-term protection.
What Is Roof Flashing and Why Does It Fail?
Roof flashing is typically made of thin metal strips installed around chimneys, vents, skylights, and roof valleys. Its purpose is to seal joints and gaps where water might seep in. Flashing can fail due to rust, corrosion, poor installation, or physical damage caused by weather and debris. Over time, flashing can loosen or crack, leaving gaps that allow water to penetrate beneath shingles.
How to Inspect Flashing for Leaks
Regular inspection of flashing is vital for early leak detection. Look closely for signs of rust, cracks, or bent metal. Check the sealant around flashing edges—if it’s cracked or missing, water can easily get through. Also, watch for nails that may have popped out or loosened. Inspecting after storms or seasonal changes helps catch problems before they escalate.
Repairing and Sealing Flashing to Prevent Future Leaks
Small gaps or cracks can often be sealed using roofing cement or specialized flashing sealants. For damaged flashing, carefully remove the old material and install new strips, ensuring all edges are securely fastened and sealed. Overlapping flashing pieces properly and applying generous sealant at seams will create a watertight barrier, extending the life of your roof.
Prevention Tips: Keep Your Roof Leak-Free for Longer
Preventing a leaky roof is always better than repairing one. With regular care and simple maintenance, you can extend the life of your roof and avoid costly water damage. This section offers practical tips to help you stay ahead of potential problems and keep your home dry year-round.
Routine Roof Maintenance Checklist
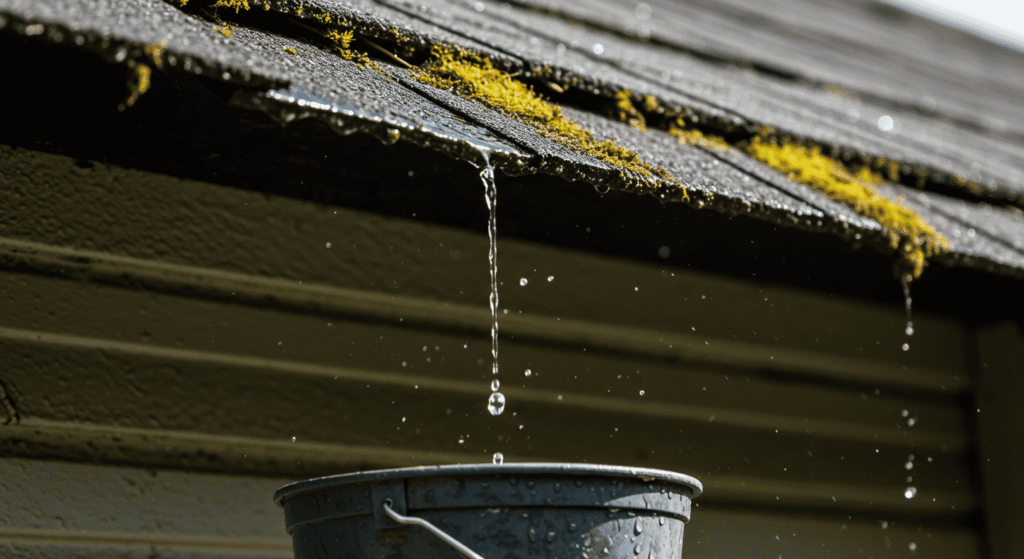
Regular inspections are key to catching issues early. Check for damaged or missing shingles, loose flashing, and signs of moss or algae growth. Look out for debris buildup, and ensure all roof penetrations—like vents and chimneys—are properly sealed. Making routine checks a habit can save you from expensive repairs down the line.
Gutter Cleaning and Its Importance in Leak Prevention
Clogged gutters cause water to overflow, pooling around your roof edges and foundation, which can lead to leaks. Clean your gutters at least twice a year to ensure water flows freely. Also, inspect gutter joints and downspouts for leaks or damage. Properly functioning gutters protect your roof’s edges and reduce the risk of water intrusion.
Attic Inspection: Ventilation and Moisture Control
A well-ventilated attic helps prevent moisture buildup that can damage your roof’s structure and cause leaks. Check your attic regularly for signs of dampness, mold, or insulation issues. Ensure vents are clear and functioning to promote airflow. Controlling moisture inside the attic is a crucial part of a healthy, leak-free roof.
| Season | Maintenance Tasks |
|---|---|
| Spring | Clean gutters, inspect shingles |
| Summer | Check attic ventilation, remove debris |
| Fall | Clear gutters, inspect flashing and seals |
| Winter | Remove snow buildup, check for ice dams |
Understanding Water Damage from Roof Leaks: What to Watch For
Fixing a leaky roof isn’t just about stopping the drip — it’s also crucial to understand the damage water can cause inside your home. Water intrusion can lead to hidden problems like mold growth and structural weakening, which threaten both your property and health. This section highlights key signs of water damage and guides you on when to act quickly or call in experts.
Mold, Mildew, and Structural Damage Risks
Water that seeps through your roof creates a damp environment ideal for mold and mildew, which can cause respiratory issues and allergies. Over time, moisture can weaken wooden beams, drywall, and insulation, compromising your home’s structural integrity. Ignoring these signs can lead to costly repairs and safety hazards.
How to Inspect Your Home’s Interior After a Leak
After identifying a roof leak, thoroughly check ceilings, walls, and attic spaces for discoloration, warping, or a musty smell. Look for bubbling or peeling paint and soft spots in drywall, which indicate prolonged moisture exposure. Early detection inside your home helps prevent worsening damage.
When Water Damage Requires Professional Help
If water damage is extensive—such as widespread mold growth, sagging ceilings, or structural instability—it’s time to contact professionals. Certified specialists can assess the full scope of damage, safely remove mold, and perform necessary structural repairs. Prompt action ensures your home remains safe and habitable.
DIY vs. Professional Roof Leak Repair: Making the Right Choice
Deciding how to fix a leaky roof can be tricky—should you roll up your sleeves and do it yourself, or call in a professional? Both options have their benefits and drawbacks depending on the leak’s severity, your skills, and budget. This section breaks down what to consider so you can make an informed decision that suits your needs.
Pros and Cons of DIY Repairs
DIY repairs can save money upfront and give you the satisfaction of fixing your own home. Simple fixes like patching small leaks or applying sealants are often manageable for homeowners. However, DIY comes with risks like improper repairs, safety hazards, and missing hidden damage that could worsen over time. Time and skill limitations may also lead to repeated fixes rather than a lasting solution.
When to Hire a Roofing Contractor
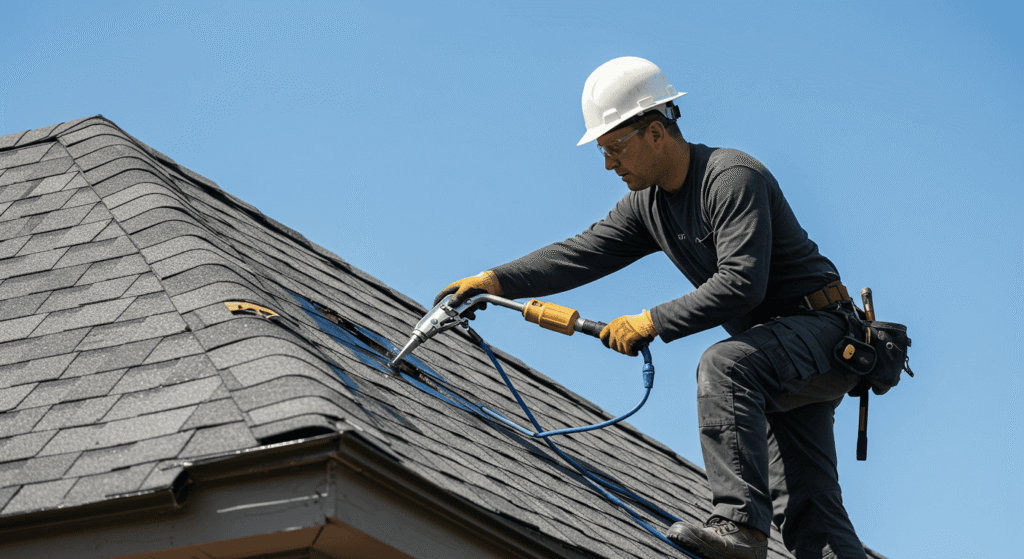
Calling a professional is the safest choice for complex or extensive leaks, damaged flashing, or when your roof needs thorough inspection and repair. Experienced contractors have specialized tools, materials, and knowledge to ensure repairs are durable and code-compliant. They also provide warranties and reduce the risk of injury.
How to Prepare for a Professional Roof Inspection
Before a contractor arrives, clear access around your home and attic to make inspection easier. Gather any details about previous repairs or leak history to share. Be ready to discuss symptoms you’ve noticed and questions about the repair process. This preparation helps the professional diagnose issues quickly and offer accurate recommendations.
| Factor | DIY Repair | Professional Repair |
|---|---|---|
| Cost | Lower upfront | Higher upfront but durable |
| Risk | Higher due to safety & errors | Lower with trained expertise |
| Time | Variable, can take longer | Generally quicker and efficient |
| Effectiveness | Temporary fixes possible | Long-lasting, comprehensive |
This table helps readers weigh their options clearly and choose the best path for their roof repair.
How Do I Fix a Leaky Roof — Key Takeaways for a Lasting Repair
Knowing how to fix a leaky roof properly can save you from costly damage and stress down the line. By understanding the causes, spotting leaks early, applying temporary fixes, and choosing the right repair method—whether DIY or professional—you can protect your home effectively. Remember, regular maintenance and timely action are your best tools to keep your roof leak-free for years to come. Stay safe, stay proactive, and your roof will thank you!