


DIY Energy Audit is the first step toward taking control of your home’s energy use and saving money on your bills. Many homeowners don’t realize how much energy is wasted through small leaks, inefficient appliances, or poor insulation. By performing a DIY energy audit, you can identify these problem areas, understand where your energy is going, and implement simple changes that make a real difference.
A DIY home energy audit checklist helps you systematically examine your home, uncover hidden energy losses, and prioritize fixes that offer the most savings. With the right approach, tools, and tips, you can reduce energy waste, improve comfort, and even increase the value of your home—all without waiting for a professional.
This guide will show you practical energy efficiency tips, step-by-step techniques, and actionable insights to turn your home into a more efficient, cost-effective space.
Introduction – Why a DIY Energy Audit Can Save You Money
A DIY Energy Audit is an essential step for any homeowner who wants to take control of their energy use and reduce monthly expenses. Many homes unknowingly lose significant amounts of energy through inefficient systems, unnoticed leaks, or outdated appliances. Conducting a DIY home energy audit allows you to identify these issues, make targeted improvements, and ultimately save money while improving the comfort and efficiency of your home.
Performing a DIY energy audit is not just about spotting problems; it’s about understanding where energy is being wasted and implementing cost-effective solutions that can have a long-term impact. With a clear process and practical energy efficiency tips, you can make your home more sustainable without relying on professional services.
The Hidden Costs of Energy Waste
Energy waste in a typical home can be surprisingly high, often adding hundreds of dollars to your annual bills. By understanding the main sources of energy loss, you can prioritize fixes that deliver the biggest savings. The table below provides a snapshot of where homes commonly lose energy:
| Area of Loss | Average Energy Loss | Common Causes |
|---|---|---|
| Heating | 25% | Poor insulation, drafts around windows and doors |
| Cooling | 20% | Leaky ducts, inefficient AC systems |
| Lighting | 10% | Incandescent bulbs, lights left on unnecessarily |
| Appliances & Electronics | 15% | Old appliances, standby power usage |
| Water Heating | 15% | Inefficient water heaters, heat loss in pipes |
| Other (miscellaneous) | 15% | Small leaks, unnoticed energy drains |
This table illustrates that energy waste is often distributed across multiple areas, meaning small, targeted improvements in each category can add up to substantial savings.
How a DIY Approach Can Empower Homeowners
One of the biggest advantages of a DIY energy audit is the sense of control it gives homeowners. By performing the audit yourself, you gain firsthand knowledge of how your home consumes energy and which areas are most in need of improvement.
Compared to waiting for a professional audit, a DIY home energy audit checklist allows you to act immediately, identify issues in real time, and make cost-effective fixes without scheduling delays. It also empowers you to track your own progress, apply energy efficiency tips tailored to your home, and potentially reduce utility costs without waiting for external services.
Taking a proactive approach not only saves money but also gives you the confidence to make informed decisions about future upgrades, maintenance, or improvements to your home’s energy systems.
Understanding Energy Efficiency in Your Home
Improving your home’s energy efficiency is about making smart choices to reduce waste and maximize the performance of your systems. A DIY Energy Audit helps you identify which parts of your home are consuming the most energy and where small adjustments can lead to meaningful savings. By understanding the fundamentals of energy efficiency and common sources of waste, you can take targeted steps to reduce costs and increase comfort.
What Energy Efficiency Really Means
Energy efficiency refers to using less energy to achieve the same level of comfort, performance, or productivity in your home. This involves improving the performance of heating, cooling, lighting, and appliances, while reducing unnecessary energy consumption. The table below compares efficient vs. inefficient home systems, helping you understand where improvements can be made:
| Home System | Efficient | Inefficient |
|---|---|---|
| Heating | Well-insulated, programmable thermostat, regular maintenance | Drafty, outdated furnace, no temperature control |
| Cooling | Properly sized AC, sealed ducts, ceiling fans | Leaky ducts, oversized or old AC unit |
| Lighting | LED bulbs, natural lighting, timers | Incandescent bulbs, lights left on |
| Appliances | Modern, energy-rated appliances, regular maintenance | Old, inefficient appliances, standby power usage |
| Water Heating | Insulated tanks, low-flow fixtures | Uninsulated tanks, high water usage |
Common Sources of Energy Loss
Even small inefficiencies in your home can add up to significant energy waste. During a DIY home energy audit, it’s important to check these common areas to pinpoint where improvements can have the biggest impact:
| Area | Typical Energy Loss | Notes |
|---|---|---|
| Insulation | 20–30% | Check attic, walls, and floors for gaps |
| Windows | 10–15% | Look for drafts or single-pane inefficiencies |
| Doors | 5–10% | Weatherstripping and seals often deteriorate |
| Appliances | 15% | Older appliances consume more energy |
| HVAC Systems | 20–25% | Inspect ductwork, filters, and system efficiency |
| Lighting | 5–10% | Replace incandescent bulbs with efficient options |
Why Spotting Energy Leaks Matters
Focusing on areas with the highest energy loss first can dramatically improve efficiency and reduce bills. Start with insulation, HVAC systems, and major appliances before moving to smaller fixes. A DIY energy audit allows you to prioritize based on potential savings, making every improvement count.
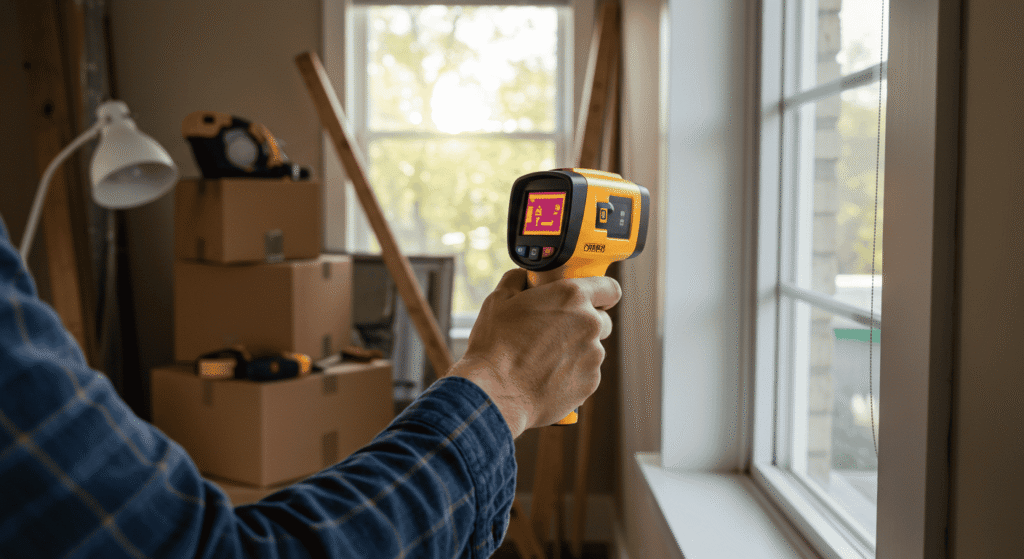
Tools and Techniques for Your DIY Energy Audit

Conducting a thorough DIY Energy Audit requires knowing which tools to use and how to apply them effectively. You don’t need expensive equipment or professional expertise—many inspections can be done with simple items you likely already have at home. Using the right techniques ensures you can accurately identify areas of energy loss and plan effective improvements.
Basic Tools You Already Have at Home
A DIY home energy audit checklist often starts with basic household tools. These items help you examine your home systematically, detect leaks, and assess system efficiency. The table below shows essential tools and their purposes:
| Tool | Purpose |
|---|---|
| Thermometer | Measure room and appliance temperatures to detect inefficiencies |
| Flashlight | Inspect dark areas such as attics, basements, and wall cavities |
| Ruler or Tape Measure | Check insulation thickness or window/door gaps |
| Notepad or Checklist | Track findings during the audit |
| Smoke Pen or Incense Stick | Detect drafts around doors, windows, and vents |
| Calculator | Estimate potential energy savings based on findings |
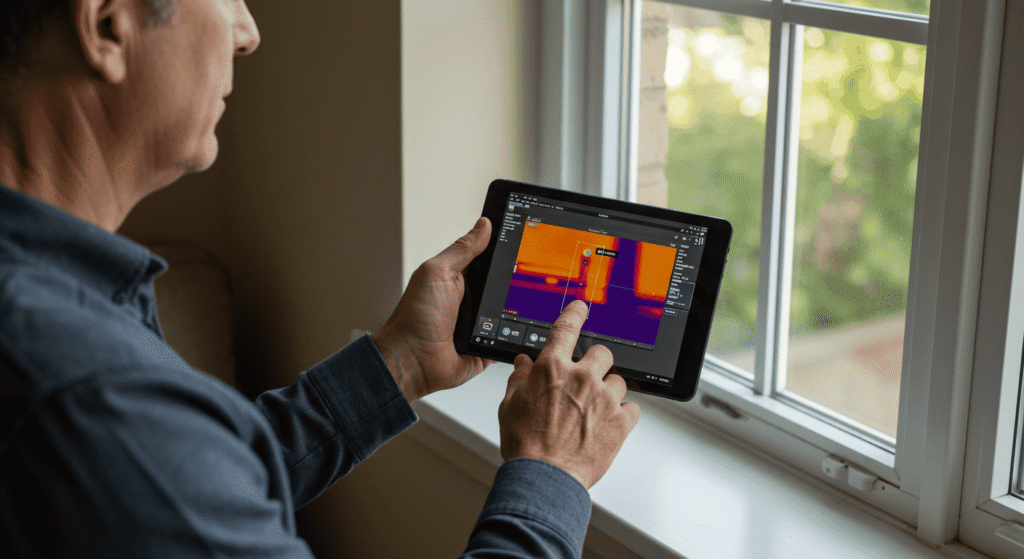
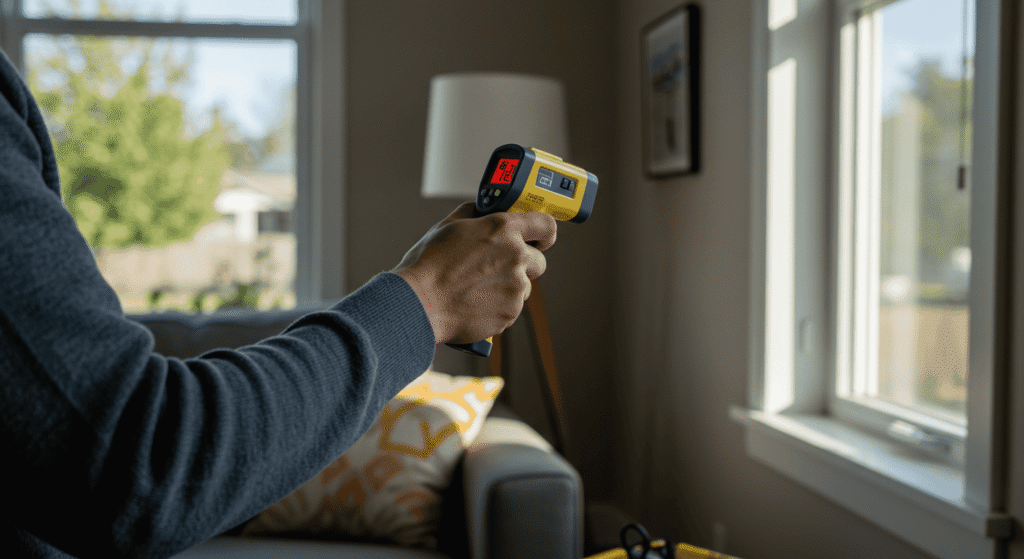
Advanced Techniques Without Professionals
Once you have your basic tools, you can use simple techniques to uncover hidden energy waste without calling a professional. These methods make your DIY energy audit more effective:
- Door and Wall Draft Tests: Light a candle or incense stick near doors, windows, or wall gaps. If the flame or smoke moves, air is escaping and should be sealed.
- Insulation Checks: Examine attics, crawl spaces, and wall cavities. Ensure insulation is evenly distributed and meets recommended thickness.
- Appliance Efficiency Observation: Check older appliances for excessive heat, noise, or irregular operation, which can indicate higher energy consumption.
Record-Keeping Tips
Tracking your findings is crucial for turning insights into action. Use tables to record each observation, the location, the type of inefficiency, and potential fixes. This approach keeps your DIY home energy audit organized and allows you to prioritize improvements based on estimated energy savings. Example table format:
| Area | Issue Detected | Tool Used | Suggested Fix | Priority |
|---|---|---|---|---|
| Living Room Window | Draft | Smoke Pen | Add weatherstripping | High |
| Attic | Thin insulation | Tape Measure | Add insulation | High |
| Refrigerator | Excess heat | Thermometer | Service/replace | Medium |
Step-by-Step DIY Energy Audit Checklist
A structured approach is essential for a successful DIY Energy Audit. By following a step-by-step process, you can systematically evaluate each area of your home, identify energy waste, and prioritize fixes that deliver the highest savings. Using tables to organize your findings makes the process clearer and more actionable.
Room-by-Room Inspection
Performing a room-by-room inspection ensures no area is overlooked. During this step, use your DIY home energy audit checklist to examine common problem areas. The table below summarizes key checks and estimated energy losses for each room:
| Room | Common Issues | What to Check | Estimated Energy Loss |
|---|---|---|---|
| Living Room | Drafty windows, old lighting | Windows, doors, light fixtures | 10–15% |
| Kitchen | Old appliances, refrigerator leaks | Appliance efficiency, seals | 15% |
| Bedrooms | Inefficient heating/cooling | HVAC vents, insulation | 10–12% |
| Bathroom | Hot water wastage, poor ventilation | Water heater, faucets, exhaust | 8–10% |
| Attic/Basement | Insufficient insulation | Insulation thickness, leaks | 20–25% |
Seasonal Considerations
Energy usage can vary with the seasons, so a DIY energy audit should account for both heating and cooling demands.
- Winter: Focus on heat loss through windows, doors, and attic insulation. Check for drafts and seal leaks to reduce heating bills.
- Summer: Examine cooling efficiency, including air conditioning performance, duct leaks, and shading around windows to minimize energy used for cooling.
Regularly auditing your home across seasons ensures you catch all energy inefficiencies, no matter the time of year.
Prioritizing Fixes
Not all energy-saving measures have the same impact. Prioritizing high-impact fixes first ensures your DIY energy audit delivers the maximum savings with minimal effort. The table below ranks common issues by potential savings:
| Issue | Estimated Savings | Priority Level |
|---|---|---|
| Attic insulation gaps | High | 1 |
| Drafty windows/doors | Medium-High | 2 |
| Old appliances | Medium | 3 |
| Inefficient lighting | Medium | 4 |
| Water heater heat loss | Medium | 5 |
| Small leaks and drafts | Low | 6 |
Identifying and Reducing Energy Waste
After completing your DIY Energy Audit, the next step is to focus on identifying specific sources of energy waste and implementing practical solutions. Addressing both structural issues and daily habits can lead to significant savings on your energy bills while improving comfort throughout your home.
Air Leaks and Insulation Problems
Air leaks and poor insulation are among the most common causes of energy waste in homes. Detecting and sealing these areas can dramatically improve energy efficiency. The table below lists signs of leaks and suggested fixes:
| Signs of Leaks | Common Locations | Suggested Fix |
|---|---|---|
| Drafts felt near windows or doors | Window frames, exterior doors | Add weatherstripping or caulk gaps |
| Cold spots in rooms | Walls, floors, ceilings | Add or improve insulation |
| Uneven heating/cooling | Attic, basement, crawl spaces | Seal ducts and insulate pipes |
| Visible gaps or cracks | Around vents, outlets, plumbing | Use sealant or foam insulation |
Lighting and Appliance Efficiency
Updating lighting and appliances is another effective way to reduce energy consumption. The table below compares old versus efficient systems and highlights potential savings:
| Appliance/Lighting | Old System | Efficient System | Estimated Savings |
|---|---|---|---|
| Light bulbs | Incandescent | LED | 60–80% |
| Refrigerator | 15+ years old | Modern energy-rated | 10–20% |
| Air Conditioner | Old, inefficient | Properly sized, maintained | 15–25% |
| Washing Machine | Standard | High-efficiency | 10–15% |
| Water Heater | Traditional tank | Insulated or on-demand | 10–20% |
Behavior Changes That Help
In addition to structural improvements, small daily actions can further reduce energy waste. A DIY Energy Audit should also consider homeowner habits, as these often have cumulative effects over time. The table below provides practical behavior changes:
| Action | Description | Estimated Impact |
|---|---|---|
| Turn off lights when not in use | Avoid leaving lights on unnecessarily | 5–10% savings |
| Unplug idle electronics | Reduce standby power consumption | 3–5% savings |
| Adjust thermostat | Set lower in winter, higher in summer | 10–15% savings |
| Use ceiling fans strategically | Supplement HVAC system | 3–7% savings |
| Shorten shower times | Reduce hot water usage | 2–5% savings |
Calculating Your Potential Savings
After completing your DIY Energy Audit, understanding the financial impact of your findings is essential. Estimating potential savings helps you prioritize improvements, make informed decisions, and track the effectiveness of the changes you implement.
How to Estimate Energy Savings
To determine the value of each improvement, calculate the estimated monthly energy loss, the cost of the fix, and the potential savings. The table below provides a practical framework:
| Issue | Estimated Monthly Loss | Cost to Fix | Potential Savings |
|---|---|---|---|
| Drafty windows | $15–$25 | Low (weatherstripping/caulking) | $10–$20/month |
| Poor attic insulation | $20–$40 | Medium (adding insulation) | $15–$35/month |
| Old refrigerator | $10–$30 | High (replacement) | $15–$25/month |
| Inefficient lighting | $5–$15 | Low (switch to LEDs) | $5–$12/month |
| Leaky ducts | $15–$35 | Medium | $10–$30/month |
Tracking Progress Over Time
Monitoring your energy usage before and after implementing improvements allows you to evaluate the effectiveness of your DIY home energy audit. Keeping a simple table to track monthly energy bills, thermostat settings, and usage patterns makes this process straightforward:
| Month | Energy Usage Before (kWh) | Energy Usage After (kWh) | Observed Change |
|---|---|---|---|
| January | 900 | 750 | -150 kWh |
| February | 850 | 700 | -150 kWh |
| March | 870 | 720 | -150 kWh |
Setting Realistic Goals
Setting achievable energy-saving goals keeps you motivated and ensures your efforts are practical. For example, a reasonable target might be a 10–20% reduction in energy use within three months. Adjust goals based on your home’s size, energy usage patterns, and the improvements you’ve implemented. Tracking progress regularly ensures you stay on track and continue to uncover additional opportunities for savings.
Common Mistakes to Avoid During a DIY Energy Audit
Even with a thorough DIY Energy Audit, homeowners can make mistakes that reduce the effectiveness of their efforts. Understanding common pitfalls helps ensure your audit produces accurate results and leads to meaningful energy savings.
Overlooking Small Energy Leaks
Small leaks or inefficiencies may seem minor, but they often add up to significant energy waste over time. During a DIY home energy audit, it’s important to pay attention to these often-overlooked areas. The table below highlights common small sources of energy loss and suggested fixes:
| Small Energy Leak | Location | Suggested Fix |
|---|---|---|
| Electrical outlets | Exterior walls | Use foam gaskets or outlet insulation |
| Plumbing penetrations | Basement or crawlspace | Seal gaps with caulk or foam |
| Light switch plates | Exterior walls | Install insulated switch plates |
| Chimney or vents | Roof or attic | Close dampers when not in use |
| Minor gaps around window frames | All rooms | Apply caulking or weatherstripping |
Ignoring Seasonal or Lifestyle Factors
Energy usage can vary significantly based on the season or household habits. For example, heating costs rise in winter, while air conditioning can spike summer bills. Similarly, changes in occupancy, working from home, or lifestyle routines affect energy consumption. A DIY Energy Audit should account for these variables to ensure your estimates and fixes are accurate. Track energy patterns over multiple months or seasons for a more comprehensive assessment.
Misinterpreting Your Findings
Misreading your audit results can lead to unnecessary fixes or missed opportunities for savings. Avoid common misunderstandings by:
- Focusing on high-impact areas first rather than chasing minor inefficiencies.
- Comparing findings across similar rooms or systems to identify patterns.
- Using tables to organize observations, which clarifies priorities and potential savings.
Proper documentation and careful interpretation of data ensure your DIY home energy audit leads to practical improvements and measurable reductions in energy use.
Next Steps After Your DIY Energy Audit
Completing a DIY Energy Audit is just the beginning. The next step is turning your findings into action by implementing improvements, deciding when professional help is necessary, and maintaining energy efficiency over the long term. Taking structured steps ensures your efforts result in real savings and lasting comfort.
Implementing Low-Cost Fixes First
Starting with easy, low-cost improvements allows you to see immediate results without a large investment. The table below lists common fixes, their estimated costs, and potential savings:
| Fix | Estimated Cost | Savings Potential |
|---|---|---|
| Weatherstripping doors and windows | $10–$50 | $10–$25/month |
| Sealing duct leaks | $20–$75 | $10–$30/month |
| Switching to LED bulbs | $5–$20 per room | $5–$12/month |
| Insulating water heater | $15–$30 | $5–$10/month |
| Adding pipe insulation | $10–$25 | $2–$5/month |
When to Consider Professional Help
While a DIY home energy audit can address many issues, there are times when a professional assessment is beneficial. Consider seeking expert help if:
- You detect major HVAC system inefficiencies that require advanced diagnostics.
- Structural insulation issues are extensive or difficult to access.
- Electrical or gas systems need evaluation for safety and compliance.
- Your energy usage remains unusually high despite completing all recommended DIY improvements.
Maintaining Energy Efficiency Long-Term
Sustaining energy efficiency requires ongoing monitoring and small seasonal adjustments. Use a checklist table to track regular maintenance and energy-saving actions:
| Season | Tasks | Purpose |
|---|---|---|
| Winter | Check insulation, seal drafts, set thermostat efficiently | Reduce heating costs |
| Spring | Inspect cooling systems, clean vents, check appliance performance | Prepare for summer efficiency |
| Summer | Monitor AC performance, use shading, adjust thermostat | Reduce cooling costs |
| Fall | Inspect insulation, service HVAC, weatherstrip windows | Prepare for winter efficiency |
By following these steps, you ensure that your DIY Energy Audit leads to long-term savings and a more comfortable, energy-efficient home.
Conclusion – Why a DIY Energy Audit is Worth It
A DIY Energy Audit is more than just a checklist—it’s a smart investment in your home’s comfort, efficiency, and long-term savings. By identifying energy leaks, upgrading inefficient systems, and making small daily changes, you can cut costs while reducing your environmental footprint. The best part? You stay in control, making improvements at your own pace. Taking the time to complete a DIY energy audit today sets the foundation for lower bills and a more sustainable home tomorrow.