


Flooring installation is a crucial step in transforming your home, whether you’re renovating a single room or upgrading your entire space. Done correctly, it not only enhances the aesthetics of your home but also boosts durability and home value. For homeowners, understanding the step-by-step process, choosing the right flooring materials, and knowing essential tools can make the job easier and more satisfying. In this guide, we’ll walk you through everything you need to know for a smooth, efficient flooring installation, providing practical tips, tables, and expert advice to help you achieve professional results—without the stress.
1. Why Proper Flooring Installation Matters
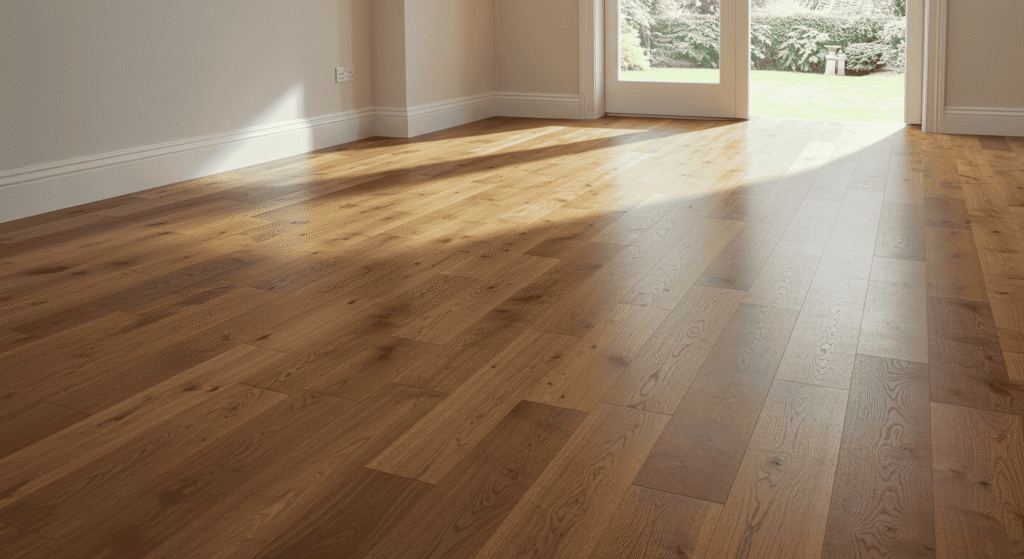
Proper flooring installation is more than just laying down planks or tiles. It ensures that your floors not only look great but also function effectively for years to come. Whether you are installing hardwood, laminate, or vinyl flooring, taking the time to do it correctly can prevent costly repairs, enhance home value, and give your space a polished, professional finish.
The Impact of Installation on Longevity
The durability of your floors depends heavily on the quality of the installation. Even high-quality flooring materials can fail prematurely if they are not installed correctly. Proper alignment, spacing, and securing techniques reduce the risk of issues such as warping, buckling, or gaps between planks. Additionally, using the right underlayment and checking the subfloor for level and moisture ensures your flooring maintains its integrity over time.
How Installation Affects Home Value
Well-installed flooring significantly impacts your home’s aesthetics and overall resale value. Smooth, even floors without visible gaps or imperfections create a sense of quality and craftsmanship that potential buyers notice. Proper installation techniques also ensure functionality—such as even surfaces that prevent tripping hazards and floors that withstand daily wear—making your home more appealing and market-ready.
Common Problems From Poor Installation
Improper flooring installation can lead to a variety of problems that compromise both the look and function of your floors. Understanding these issues beforehand helps homeowners avoid them and take preventive measures. The table below highlights some common problems, their causes, and simple solutions:
| Problem | Cause | Solution |
|---|---|---|
| Warping | Excess moisture or uneven subfloor | Ensure subfloor is dry and level; use proper underlayment |
| Gaps Between Planks | Incorrect spacing or temperature changes | Use spacers during installation; allow acclimation time for materials |
| Squeaking | Loose planks or inadequate adhesive | Secure loose planks with nails or adhesive; check subfloor support |
| Buckling | Moisture, poor expansion gaps | Maintain proper expansion gaps; control humidity |
| Uneven Surface | Subfloor not leveled | Level subfloor before installation |
This proactive approach to flooring installation prevents long-term damage and helps you enjoy a durable, attractive floor for years.
2. Choosing the Right Flooring for Your Home
Selecting the right flooring is a critical step in your flooring installation journey. The best choice depends on factors like room usage, moisture levels, traffic, and your personal style. Choosing wisely ensures durability, comfort, and a polished look that complements your home’s décor.
Understanding Different Flooring Materials
Different flooring materials come with unique benefits and drawbacks. Knowing the pros and cons of each option helps you make an informed decision that fits both your lifestyle and budget. The table below summarizes key flooring types and their best uses:
| Material | Pros | Cons | Best Use |
|---|---|---|---|
| Hardwood | Durable, timeless look, increases home value | Can scratch, sensitive to moisture | Living rooms, bedrooms |
| Laminate | Affordable, easy to install, scratch-resistant | Less durable than hardwood, may feel less authentic | High-traffic areas, rentals |
| Vinyl | Water-resistant, easy maintenance, versatile | Can dent, may fade over time | Kitchens, bathrooms, basements |
| Tile | Extremely durable, water and stain-resistant | Hard underfoot, cold, grout requires maintenance | Bathrooms, kitchens, entryways |
| Cork | Comfortable, eco-friendly, sound-absorbing | Can dent easily, requires sealing | Bedrooms, offices, living areas |
Matching Flooring to Room Conditions
Not every flooring type works well in all environments. Considering room conditions ensures long-lasting results:
- Moisture: Avoid hardwood in bathrooms or basements; vinyl or tile is better suited.
- Traffic: High-traffic areas like hallways require durable and scratch-resistant floors, such as laminate or tile.
- Temperature: Some floors, like hardwood, can expand or contract with seasonal temperature changes; consider proper acclimation before installation.
Style and Functionality Considerations
Choosing the right flooring isn’t just about durability—it’s also about how it fits your home décor and lifestyle. The design, color, and texture affect usability and the overall ambiance of the room:
- Lighter tones can make small spaces feel larger, while darker tones create a cozy feel.
- Patterns and plank orientation can visually lengthen or widen a room.
- Functional considerations, such as slip-resistance in bathrooms or cushioned floors in kids’ rooms, improve comfort and safety.
By carefully evaluating flooring materials, room conditions, and style preferences, you can select a floor that enhances both functionality and aesthetics.
3. Preparing Your Room for Flooring Installation
Proper preparation is a key step in flooring installation. Taking the time to measure, plan, and prepare the space ensures a smooth installation and a professional-looking result. It also helps prevent issues such as uneven surfaces, gaps, or premature wear.
Measuring and Planning Your Space
Accurate measurements are essential to avoid buying too little or too much flooring material. Planning ahead allows you to calculate how much flooring you need and account for waste, cuts, and mistakes. Use the table below as a guide:
| Room Dimensions (ft) | Flooring Needed (sq. ft.) | Extra for Waste (10%) |
|---|---|---|
| 10 x 12 | 120 | 12 |
| 15 x 20 | 300 | 30 |
| 12 x 15 | 180 | 18 |
| 8 x 10 | 80 | 8 |
| 20 x 25 | 500 | 50 |
Clearing and Preparing the Subfloor
A clean, level subfloor is crucial for successful flooring installation. Before laying any material:
- Remove old flooring, nails, or staples.
- Clean the subfloor of dust, dirt, and debris.
- Check for moisture issues using a moisture meter or visual inspection.
- Level the floor to prevent uneven surfaces that could cause squeaks, gaps, or premature wear.
Taking these steps ensures your new floor will sit evenly and remain durable for years.
Choosing the Right Underlayment
The underlayment acts as a protective layer between your flooring and the subfloor, offering multiple benefits:
- Soundproofing: Reduces noise from footsteps, particularly in multi-level homes.
- Insulation: Helps maintain room temperature and improve comfort.
- Moisture Protection: Prevents water damage and reduces the risk of mold growth.
Selecting the appropriate underlayment based on your flooring material and room conditions is essential for achieving a long-lasting and comfortable floor.
4. Essential Tools and Materials for Flooring Installation
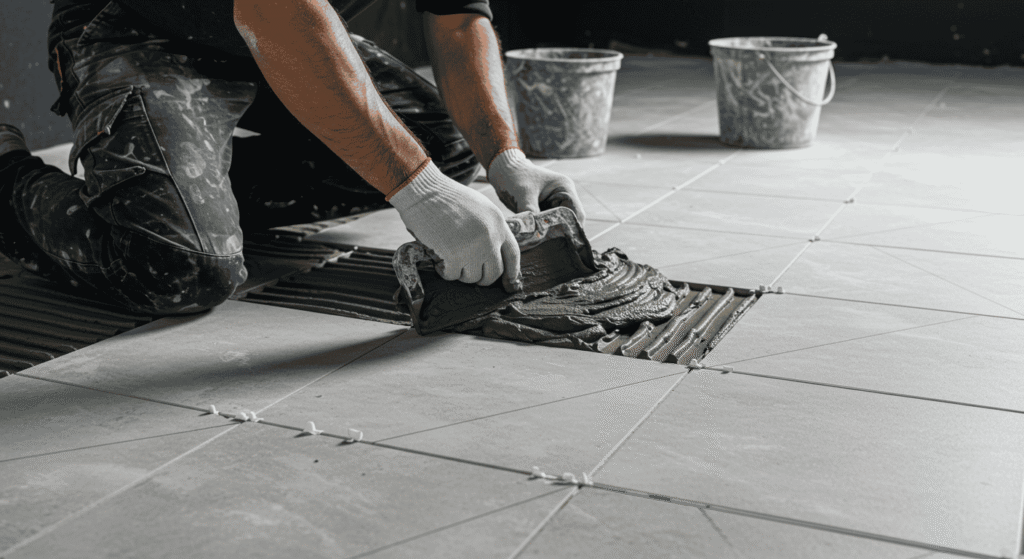
Having the right tools and materials is crucial for a successful flooring installation. Proper preparation ensures efficiency, accuracy, and a professional finish while reducing the risk of mistakes or damage.
Must-Have Tools
Using the correct tools makes the installation process smoother and ensures the longevity of your flooring. The table below highlights the essential tools, their purposes, and tips for effective use:
| Tool | Purpose | Tips for Use |
|---|---|---|
| Tape Measure | Accurate measurements | Double-check measurements and mark cuts clearly |
| Spacers | Maintain expansion gaps | Place evenly along walls to prevent buckling |
| Pull Bar | Tighten planks in tight spaces | Use a tapping block to avoid damaging edges |
| Utility Knife | Cutting underlayment or vinyl | Score lightly and snap for clean cuts |
| Hammer | Securing planks or tapping blocks | Use gently to avoid denting or cracking planks |
Materials You’ll Need
In addition to tools, ensure you have all necessary materials before starting the installation:
- Flooring planks (hardwood, laminate, vinyl, or tile)
- Underlayment appropriate for your flooring type
- Adhesive (if required by your flooring material)
- Spacers for expansion gaps
- Moisture barrier for areas prone to dampness
Having all materials on hand helps maintain a smooth workflow and reduces interruptions during installation.
Safety Tips
Proper safety measures protect you and ensure the installation goes smoothly:
- Wear protective gloves and safety goggles to prevent injuries from sharp tools and materials.
- Maintain proper posture when lifting planks or kneeling to avoid strain.
- Handle utility knives and other sharp tools carefully, cutting away from your body and keeping blades sharp for cleaner cuts.
- Keep your work area tidy to prevent trips, falls, or accidental damage to your flooring materials.
By equipping yourself with the right tools, materials, and safety practices, your flooring installation will be easier, faster, and more precise.
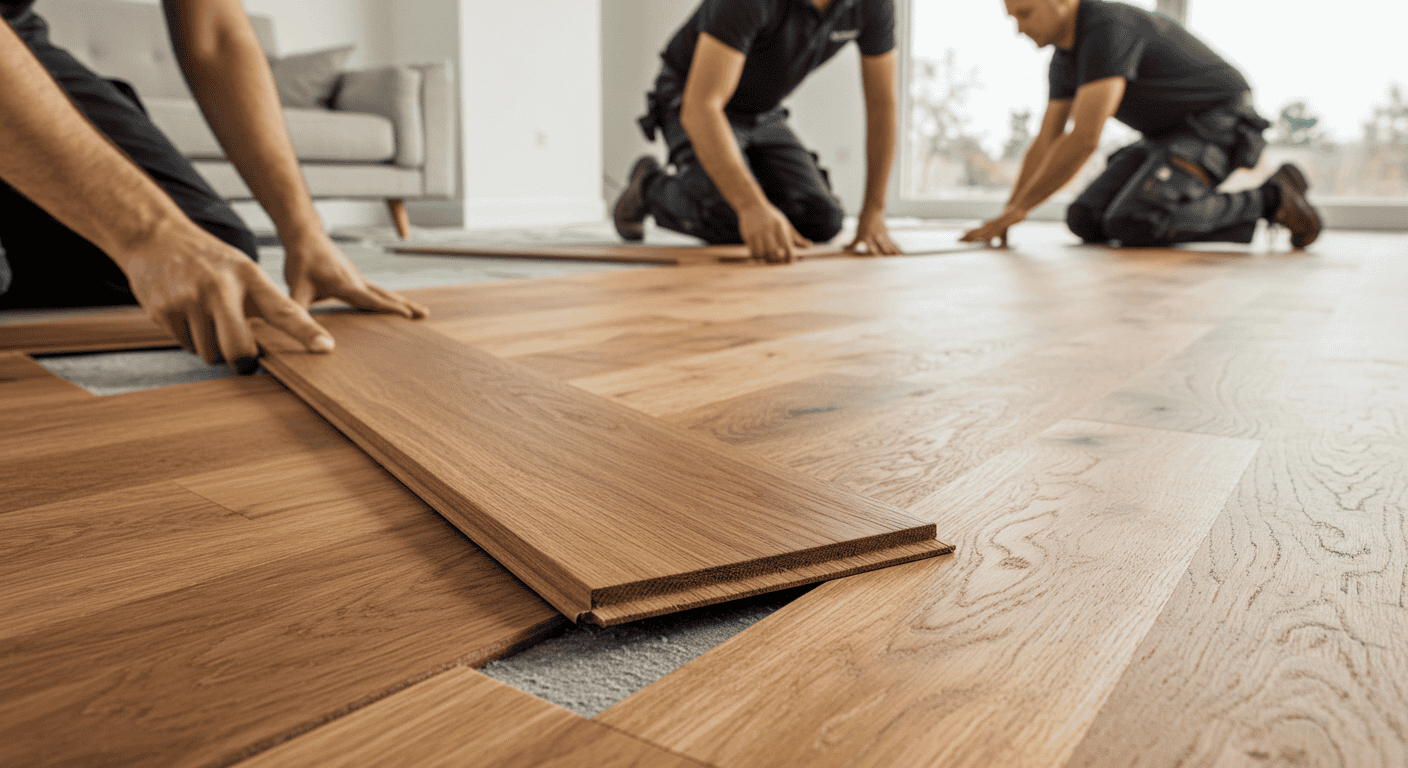
5. Step-By-Step Flooring Installation Process
Following a clear flooring installation process ensures your new floors are level, durable, and visually appealing. Taking the time to work methodically helps prevent mistakes and improves the overall finish.
Preparing the First Row
The first row sets the foundation for your entire floor, so precision is key:
- Choose a starting corner, ideally along the longest, straightest wall.
- Use spacers to maintain proper expansion gaps between the wall and the planks.
- Ensure the first row is perfectly straight and aligned, as any misalignment can affect the entire floor.
- Double-check measurements and make any necessary adjustments before continuing.
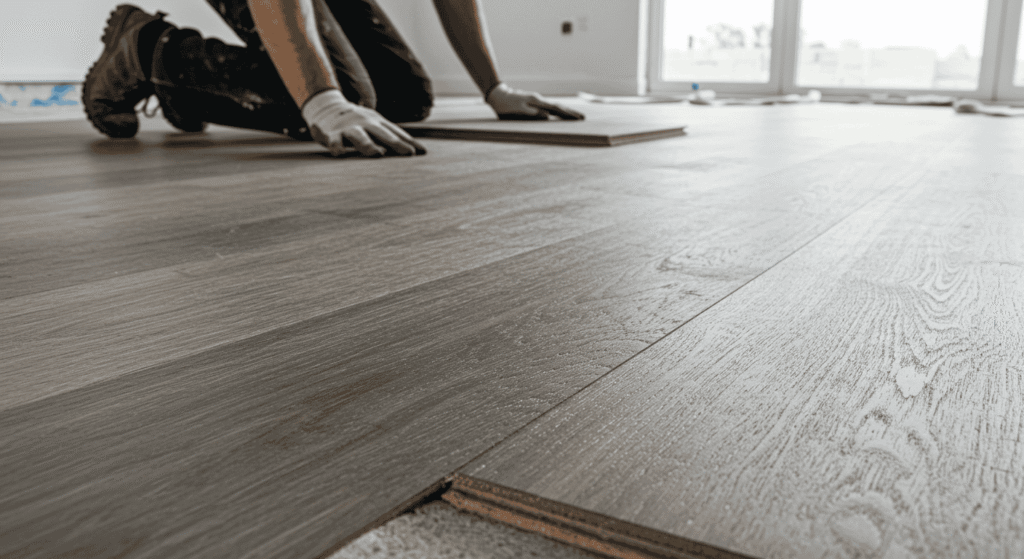
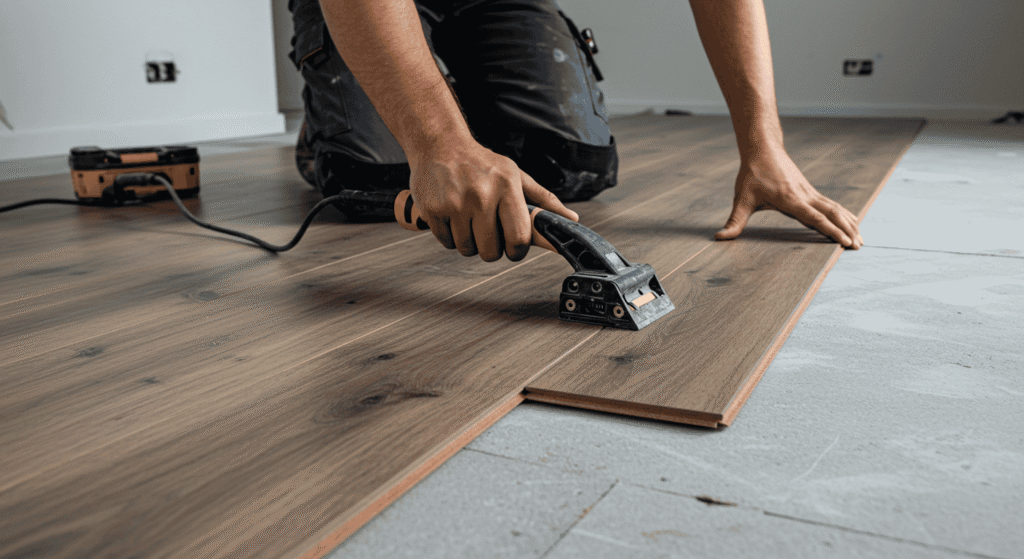
Installing the Middle Rows
Once the first row is set, installing the middle rows becomes more straightforward:
- Stagger joints to create a natural look and improve stability. Avoid aligning end joints in consecutive rows.
- Use a tapping block or pull bar to snug planks together without damaging the edges.
- Maintain consistent spacing along walls and check frequently with a level to ensure the floor remains even.
Finishing Touches
Completing your flooring installation requires attention to detail:
- Trim planks to fit around doorways, vents, and other obstacles.
- Remove spacers and install baseboards or molding to cover expansion gaps.
- Inspect the floor for any gaps, uneven planks, or loose pieces and correct as needed.
Quick Troubleshooting Table
Even with careful installation, minor issues may arise. The table below highlights common problems, their likely causes, and easy fixes:
| Issue | Likely Cause | Easy Fix |
|---|---|---|
| Gaps Between Planks | Expansion/contraction or misalignment | Re-tap planks with tapping block; adjust expansion gaps |
| Planks Not Level | Uneven subfloor | Level subfloor or shim under low spots |
| Squeaking | Loose planks or insufficient adhesive | Secure with nails or adhesive |
| End Joints Misaligned | Improper staggering | Adjust planks and ensure proper alignment |
| Plank Damage During Installation | Excessive force or incorrect tool | Replace damaged plank; use tapping block carefully |
Following these steps carefully ensures your new floors are durable, smooth, and professional-looking.
6. Maintenance Tips for Long-Lasting Floors
Proper maintenance is essential to preserve the beauty and durability of your flooring installation. Regular care not only extends the life of your floors but also keeps them looking fresh and inviting for years to come.
Cleaning and Daily Care
Daily care depends on the type of flooring you have. Using the right cleaning methods prevents damage and keeps your floors looking their best. The table below provides guidance for common flooring types:
| Floor Type | Recommended Cleaning | Things to Avoid |
|---|---|---|
| Hardwood | Soft broom, vacuum with floor attachment, damp mop | Excess water, harsh chemicals |
| Laminate | Dry mop or slightly damp cloth | Soaking, abrasive cleaners |
| Vinyl | Sweep, damp mop with mild detergent | Harsh scrubbing, ammonia-based cleaners |
| Tile | Sweep, mop with warm water and mild cleaner | Acidic cleaners on grout, abrasive pads |
| Cork | Vacuum or damp mop, pH-neutral cleaner | Excess water, wax-based products |
Preventing Damage and Wear
Taking preventive measures protects your floors from unnecessary wear and extends their lifespan:
- Place mats at entrances to reduce dirt and moisture.
- Use furniture pads under chairs, tables, and other heavy items to prevent scratches and dents.
- Maintain consistent humidity levels to reduce expansion, contraction, and warping in sensitive flooring materials like hardwood or cork.
When to Refinish or Repair
Even with careful maintenance, floors may eventually require refinishing or repairs:
- Signs of damage: Scratches, dull finish, warping, or water stains.
- Small DIY fixes: Touch-up kits for minor scratches, tightening loose planks, or replacing a damaged plank.
- Professional help: Deep scratches, extensive warping, or structural issues should be handled by professionals to ensure long-lasting results.
By following these maintenance tips, you can enjoy your flooring installation for years while keeping your home looking beautiful and well-maintained.
7. Budgeting and Time Estimates
Understanding the costs and time involved in flooring installation helps you plan your project efficiently and avoid surprises. Proper budgeting ensures you select the right materials and installation method for your home.
Estimating Material Costs
Material costs vary depending on the type of flooring and the quality of materials chosen. The table below provides a general guide to average costs per square foot and helpful notes:
| Material Type | Average Cost per sq. ft. | Notes |
|---|---|---|
| Hardwood | $5 – $12 | Durable and high resale value |
| Laminate | $2 – $6 | Affordable, easy to install |
| Vinyl | $2 – $7 | Water-resistant, low maintenance |
| Tile | $3 – $10 | Durable, suitable for moisture-prone areas |
| Cork | $3 – $8 | Comfortable and eco-friendly |
Labor vs DIY
Deciding between hiring a professional and installing the floor yourself depends on your budget, experience, and time availability:
- DIY Installation:
- Pros: Lower cost, flexible schedule, sense of accomplishment.
- Cons: Steeper learning curve, time-consuming, potential mistakes affecting durability.
- Hiring a Professional:
- Pros: Fast, precise, ensures long-lasting results, minimal stress.
- Cons: Higher cost, requires scheduling, less hands-on involvement.
Typical Time Needed
The time required for flooring installation varies based on room size, material, and experience level:
| Room Size (sq. ft.) | Flooring Type | Estimated Time (DIY) | Estimated Time (Professional) |
|---|---|---|---|
| 100 | Laminate | 4-6 hours | 2-3 hours |
| 200 | Hardwood | 1-2 days | 5-6 hours |
| 150 | Vinyl | 6-8 hours | 3-4 hours |
| 250 | Tile | 2-3 days | 1 day |
| 120 | Cork | 6-8 hours | 3-4 hours |
Planning both your budget and time allocation helps ensure a smoother installation process and prevents delays or overspending.
8. Creative Flooring Ideas and Layout Tips
Choosing the right flooring goes beyond durability and cost. Creative design choices and thoughtful layouts can elevate the style of your home while improving functionality.
Patterns That Add Style
Flooring patterns can dramatically change the look and feel of a room. The table below highlights popular patterns, ideal room types, and their visual effects:
| Pattern | Ideal Room | Effect on Space |
|---|---|---|
| Herringbone | Living room, hallway | Adds elegance, elongates the room |
| Diagonal | Small rooms | Makes space appear larger and dynamic |
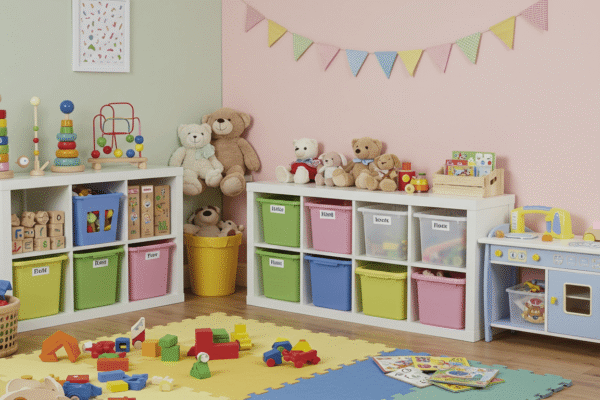
| Checkerboard | Kitchen, playroom | Creates a bold, classic visual impact |
| Straight Plank | Any room | Simple, clean, versatile look |
Combining Materials
Mixing different flooring materials or textures can create visual interest, particularly in open-concept spaces:
- Transition from hardwood in living areas to tile in kitchens or bathrooms.
- Combine textures, such as matte and glossy finishes, to define zones without walls.
- Use color contrasts to guide movement and enhance spatial definition.
Final Design Considerations
When planning your flooring installation, consider overall design and functionality:
- Flow: Ensure the flooring pattern guides movement naturally between rooms.
- Lighting: Lighter floors reflect light, making rooms feel open; darker floors create a cozy atmosphere.
- Room Function: Choose flooring that suits the activity in each space (e.g., durable, water-resistant for kitchens).
- Continuity with Décor: Select materials and colors that harmonize with furniture, walls, and décor elements.
By thoughtfully planning patterns, material combinations, and design elements, your flooring installation can transform your home into a stylish, cohesive, and functional space.
Flooring Installation: Key Takeaways for a Successful Home Project
A successful flooring installation combines careful planning, the right materials, proper tools, and attention to detail. By selecting the best flooring for your space, preparing your rooms correctly, and following step-by-step installation and maintenance tips, you can achieve durable, stylish, and functional floors. Remember, thoughtful design choices and regular care will keep your floors looking beautiful for years, adding both comfort and home value.