


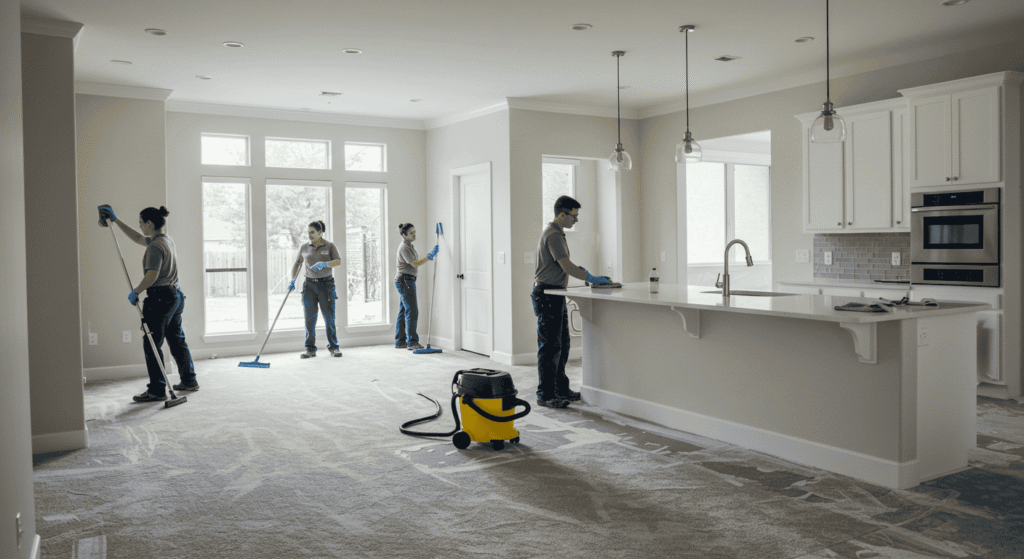
Post-construction cleaning is an essential step after any renovation or building project. Without proper construction cleanup, your newly renovated home can be left filled with dust, debris, and hidden hazards that affect both health and the overall aesthetics of your space. From dust removal after construction to ensuring move-in ready surfaces, a thorough cleanup transforms your house into a spotless, comfortable home. In this guide, we’ll cover practical tips, safe techniques, and step-by-step advice for an efficient post-renovation cleaning process that anyone can follow.
1. Why Post-Construction Cleaning Is Crucial
After a renovation or building project, post-construction cleaning is more than just tidying up. Leftover dust, debris, and residues can pose serious health risks, damage surfaces, and diminish the overall impact of your hard work. A proper construction cleanup ensures your home is safe, hygienic, and visually appealing, allowing you to fully enjoy your newly renovated space.
Health Risks of Leftover Dust and Debris
Even if your renovation looks complete, tiny dust particles and leftover debris can linger in the air and on surfaces. These particles can trigger allergies, respiratory issues, and skin irritation for both adults and children. Additionally, construction dust often contains fine particles from drywall, wood, and plaster, which can settle into carpets, vents, and hard-to-reach corners. Performing a thorough post-renovation cleaning is essential to minimize these risks and maintain a healthy living environment.
Enhancing the Aesthetics of Your Newly Renovated Home
No matter how beautiful your renovation is, accumulated dust and debris can make it look unfinished and neglected. By tackling dust removal after construction effectively, you allow walls, floors, windows, and fixtures to shine. A clean, polished space enhances the visual appeal of your home, highlights your design choices, and provides a welcoming atmosphere for family and guests.
Quick Comparison Table
| Area | Risks Without Cleaning | Recommended Cleaning Method |
|---|---|---|
| Floors | Scratches, dust buildup | Sweep, vacuum, mop |
| Walls | Paint dust, streaks | Wipe with damp cloth |
| Windows | Dust, streaks | Clean with microfiber cloth |
This table provides a quick overview of the most common areas affected by post-construction debris and simple methods to restore them to their best condition. Using these approaches during post-construction cleaning ensures both safety and a visually flawless home.
2. Preparing for Post-Construction Cleaning
Before diving into post-construction cleaning, proper preparation is essential to ensure efficiency and safety. Gathering the right tools and taking necessary precautions can save time, prevent damage to your home, and reduce potential health risks.
Gathering Tools and Equipment
Having the right equipment on hand is crucial for a successful construction cleanup. Essential tools include:
- Brooms for sweeping up large debris.
- Vacuum cleaners designed to handle fine dust particles.
- Microfiber cloths for wiping surfaces without leaving streaks.
- Dustpans, mops, and buckets for wet cleaning tasks.
- Optional extension tools for reaching high corners, vents, and ceiling fans.
Properly organizing these tools before starting ensures a smooth workflow and prevents unnecessary interruptions during dust removal after construction.
Safety Measures for a Safe Cleanup
Safety should be a top priority during post-renovation cleaning. Construction dust, sharp debris, and chemical residues can pose hazards if precautions are not taken. Key safety measures include:
- Wearing gloves to protect your hands from splinters, sharp objects, and irritants.
- Using masks, preferably N95 or higher, to avoid inhaling fine dust particles.
- Protecting your eyes with goggles, especially when vacuuming or scrubbing dusty areas.
- Ensuring proper ventilation by opening windows and using fans to circulate fresh air.
- Avoiding unsafe movements or climbing unstable surfaces to prevent injuries.
Safety Checklist
| Safety Gear | Purpose | Notes |
|---|---|---|
| Gloves | Protect hands | Thick, durable |
| Mask | Prevent inhaling dust | N95 or higher |
| Goggles | Eye protection | Dusty environments |
This checklist helps maintain a safe environment while performing thorough post-construction cleaning, allowing you to focus on efficiency without compromising health.
3. Tackling Dust: The #1 Post-Construction Challenge
One of the most persistent problems after any renovation is dust accumulation. Even small amounts of leftover dust can affect air quality, trigger allergies, and make your home feel unfinished. Understanding where dust settles and how to remove it efficiently is key to a successful post-construction cleaning.
Understanding Dust Hotspots
Dust tends to accumulate in specific areas that are often overlooked during cleaning. Common dust hotspots include:
- Corners where walls meet floors or ceilings.
- Vents and air ducts that can spread dust throughout the home.
- Baseboards and trim, which often trap fine particles.
- High surfaces such as ceiling fans, shelves, and light fixtures.
Identifying these areas beforehand ensures that no spot is neglected during dust removal after construction.
Effective Dust Removal Techniques
To achieve a thorough clean, combine multiple techniques for best results:
- Vacuuming is essential for carpets, rugs, and floors to remove fine dust and larger debris.
- Damp wiping with microfiber cloths helps trap dust on surfaces without spreading it.
- Air purifiers can reduce airborne dust and improve indoor air quality, especially in rooms with heavy renovation dust.
Dust Removal Tools & Benefits
| Tool | Best Use | Benefit |
|---|---|---|
| Vacuum | Carpets & floors | Removes fine dust |
| Microfiber Cloth | Surfaces & corners | Traps dust effectively |
| Mop | Hard floors | Eliminates residual dust |
Using the right tools and techniques ensures a more efficient and thorough post-renovation cleaning, leaving your home dust-free and ready for the next steps in making it move-in ready.
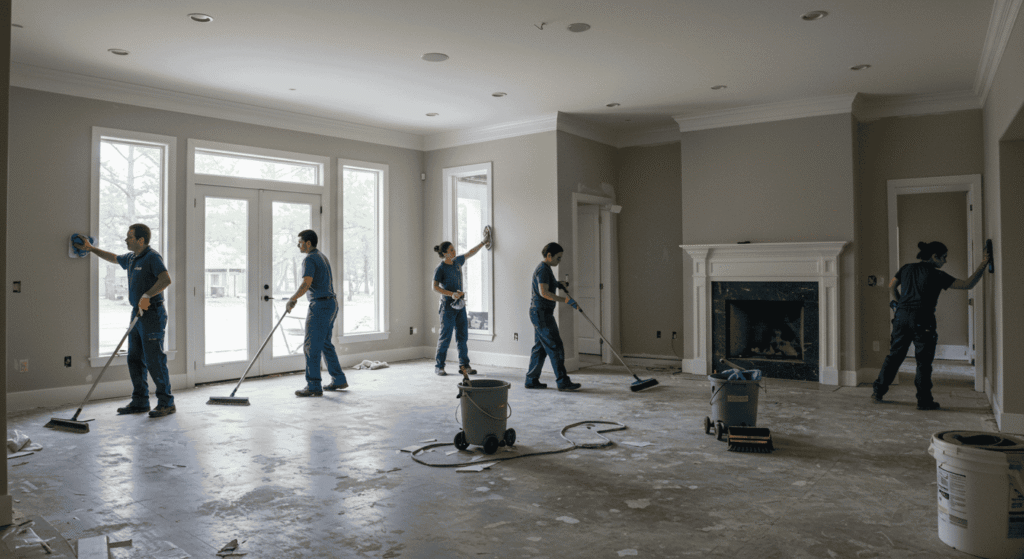
4. Cleaning Floors, Walls, and Ceilings
After tackling dust, the next step in post-construction cleaning is focusing on the major surfaces of your home. Floors, walls, and ceilings often bear the brunt of renovation debris, from dust and paint splatters to smudges and adhesive residues. Proper cleaning ensures a polished, move-in ready home while protecting your surfaces from long-term damage.
Flooring Post-Construction Cleaning
Different flooring types require tailored cleaning techniques:
- Hardwood floors should be swept first to remove loose debris, then damp-mopped to capture remaining dust. Avoid excess water to prevent warping.
- Tile flooring benefits from scrubbing with a mild cleaner, ensuring grout lines are free from dust and construction residue.
- Carpets and rugs should be thoroughly vacuumed, paying attention to corners and high-traffic areas where dust tends to settle.
Using the right approach for each surface makes your construction cleanup efficient and helps maintain the longevity of your floors.
Walls and Ceilings
Walls and ceilings often accumulate drywall dust, paint splatters, and fingerprints during renovation. To clean effectively:
- Start with a soft brush or microfiber cloth to remove dust.
- Spot-clean paint splatters using a gentle, non-abrasive solution.
- Wipe ceilings carefully to avoid streaks while removing airborne dust.
Regular attention to these surfaces enhances the overall aesthetic impact of your renovation.
Cleaning Techniques by Surface
| Surface | Cleaning Method | Frequency |
|---|---|---|
| Hardwood | Sweep → Damp mop | Weekly |
| Tiles | Scrub with mild cleaner | After each renovation |
| Drywall | Dust and wipe gently | As needed |
This table highlights the most effective cleaning methods for common surfaces and ensures a consistent approach during post-renovation cleaning, keeping your home spotless and inviting.
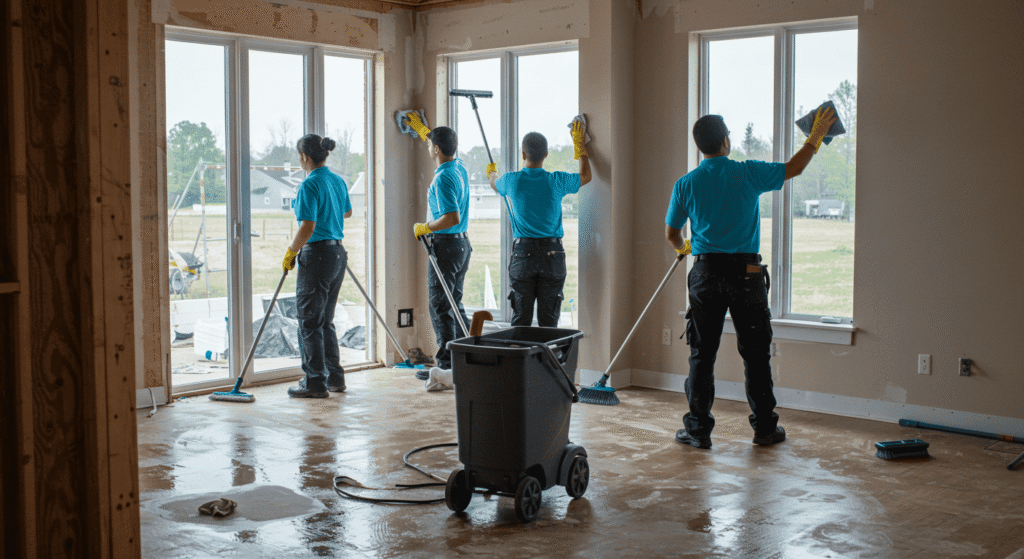
5. Post-Construction Window & Glass Cleaning
After a renovation, windows and glass surfaces often accumulate dust, paint splatters, and smudges. Effective post-construction cleaning of glass not only improves visibility but also enhances the overall brightness and appeal of your home.
Removing Dust, Paint, and Smudges
Start your construction cleanup of windows with a systematic approach:
- Remove loose dust using a dry microfiber cloth or soft brush.
- Carefully address paint splatters or adhesive residue using a mild solution or a scraping tool designed for glass.
- Wipe down smudges and fingerprints, ensuring all corners and edges are cleaned.
Taking these steps ensures your windows are free from construction residue and ready to let in natural light.
Streak-Free Tips for Crystal Clear Windows
To achieve streak-free windows, proper technique is key:
- Wipe in a top-to-bottom motion to prevent streaking.
- Use minimal cleaning solution to avoid excess moisture on the glass.
- Fold your microfiber cloth into quarters for maximum absorption and efficiency.
- Dry the glass thoroughly after cleaning to maintain a crystal-clear finish.
Tools & Techniques for Glass Cleaning
| Tool | Purpose | Tip |
|---|---|---|
| Microfiber cloth | Wipe without streaks | Fold in quarters |
| Squeegee | Remove water | Top to bottom strokes |
| Cleaning solution | Dissolve dust & smudges | Use minimal liquid |
Using the right tools and techniques during post-renovation cleaning ensures your windows and glass surfaces shine, highlighting the beauty of your newly renovated space.
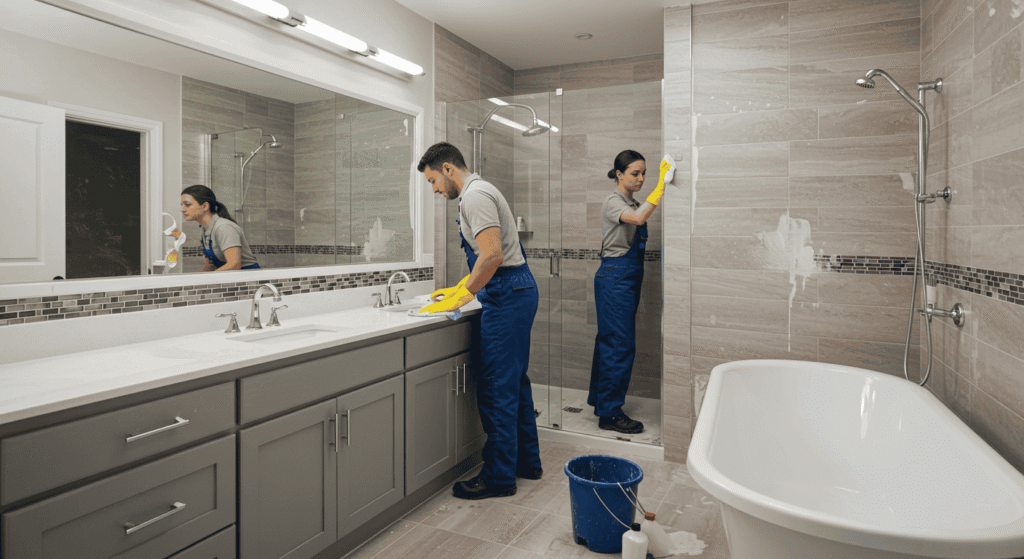
6. Kitchen and Bathroom Post-Construction Cleanup
Kitchens and bathrooms are high-traffic areas that often collect dust, debris, and construction residue after renovations. Proper post-construction cleaning ensures these spaces are not only visually appealing but also hygienic and safe for everyday use.
Removing Construction Dust from Surfaces & Fixtures
During construction cleanup, it’s essential to focus on both horizontal and vertical surfaces:
- Cabinets and countertops should be wiped thoroughly with a damp microfiber cloth to remove dust and fine particles.
- Sinks and faucets may have construction debris or residues; use gentle scrubbing to avoid scratches while restoring shine.
- Don’t forget handles, knobs, and other fixtures that often accumulate hidden dust during renovation.
By addressing these areas carefully, you prevent the spread of dust and maintain a clean, polished finish.
Sanitizing for Safety
After dust removal, the next step is sanitizing surfaces to ensure safety without leaving harmful chemical residues:
- Use mild, non-toxic disinfectants suitable for kitchen and bathroom surfaces.
- Wipe thoroughly to remove dust and cleaning solution residues.
- Ensure proper ventilation while cleaning to avoid inhaling fumes.
Following these steps ensures your kitchen and bathroom are both spotless and safe for use immediately after renovation.
Quick Room-Specific Checklist
| Room | Area | Cleaning Method |
|---|---|---|
| Kitchen | Countertops | Wipe, sanitize |
| Bathroom | Sink & faucet | Scrub, rinse |
| Bathroom | Tiles & grout | Damp mop, disinfect |
This checklist provides a practical approach to post-renovation cleaning for your most used spaces, helping you maintain a clean, hygienic, and move-in ready home.
7. Handling Construction Debris & Waste
A critical part of post-construction cleaning is managing the leftover debris and waste efficiently. Proper handling not only keeps your home safe and organized but also contributes to environmental responsibility by recycling or disposing of materials correctly.
Sorting Waste for Easy Disposal
Start by categorizing your construction debris to simplify disposal:
- Recyclable materials such as cardboard, certain plastics, and metals should be separated to reduce landfill waste.
- Reusable materials, including wood scraps or tiles in good condition, can be stored for future projects.
- Trash items that cannot be recycled or reused should be disposed of according to local regulations.
Sorting debris beforehand makes the cleanup process faster and prevents hazards like sharp nails or broken glass from causing injury.
Time-Saving Tips for Debris Removal
Efficient removal of construction waste saves time and reduces stress during post-renovation cleaning:
- Use sturdy bags or containers for sorting debris by type.
- Flatten cardboard boxes and bundle recyclables to save space.
- Follow an organized disposal plan by moving debris from room to room, then to the designated disposal area.
- Consider working in stages, focusing on one area at a time to prevent clutter and overlap.
Debris Type & Disposal Method
| Debris Type | Suggested Disposal | Notes |
|---|---|---|
| Wood scraps | Recycle or landfill | Remove nails first |
| Metal | Scrap recycling | Separate from general trash |
| Packaging | Recycle cardboard/plastic | Flatten boxes |
Following these strategies during post-construction cleaning ensures that your home stays organized, safe, and environmentally conscious while efficiently removing leftover debris.
8. Final Touches and Maintenance Tips
Completing post-construction cleaning is not just about finishing the initial cleanup—it’s also about ensuring your home stays pristine and safe for the long term. Paying attention to final details and setting a maintenance routine helps preserve the freshness and appearance of your newly renovated space.
Ensuring Every Nook and Corner is Clean
Even after major cleaning, dust and debris can linger in overlooked areas. Focus on:
- Baseboards and trim, which often collect fine dust.
- Vents and air ducts, where leftover particles can affect air quality.
- Behind appliances and furniture, where construction debris can hide.
A careful inspection and touch-up cleaning in these areas ensure a truly spotless home.
Maintenance Tips for Long-Lasting Cleanliness
Maintaining a clean home after renovation requires a consistent routine:
- Regular dusting using microfiber cloths helps prevent buildup on surfaces.
- Floor care with appropriate vacuuming and mopping methods keeps flooring in top condition.
- Air quality maintenance, including proper ventilation and air purifier use, reduces lingering dust and allergens.
Maintenance Schedule
| Task | Frequency | Tips |
|---|---|---|
| Dusting | Weekly | Use microfiber cloth |
| Vacuuming | Twice a week | High-traffic areas |
| Deep cleaning | Monthly | Focus on hard-to-reach spots |
By following these strategies and adhering to a consistent post-construction cleaning schedule, your home will remain inviting, healthy, and visually stunning for years to come.
Post-Construction Cleaning: Final Thoughts for a Spotless Home
Completing a renovation is only half the journey—the final step is effective post-construction cleaning. By tackling dust, debris, and residue systematically, and following maintenance routines, you ensure your newly renovated home is safe, healthy, and visually stunning. Implementing these strategies not only enhances your home’s aesthetics but also protects your investment for years to come. A thorough, well-planned cleanup turns your renovation from “finished” into truly move-in ready.